SwedeSpeed - Volvo Performance Forum banner

Volvo SPA Control Arm Bushings & Axle Replacement DIY

1 reading
13K views 26 replies 9 participants last post by  sorpera  
#1 ·
Hi everyone,

I'm sharing some tips and DIY on how to replace the control arm bushings/axles on Volvo SPA XC90 S90 S60 XC60.


Important: if you are replacing the bushings, ensure you get the updated part and design.

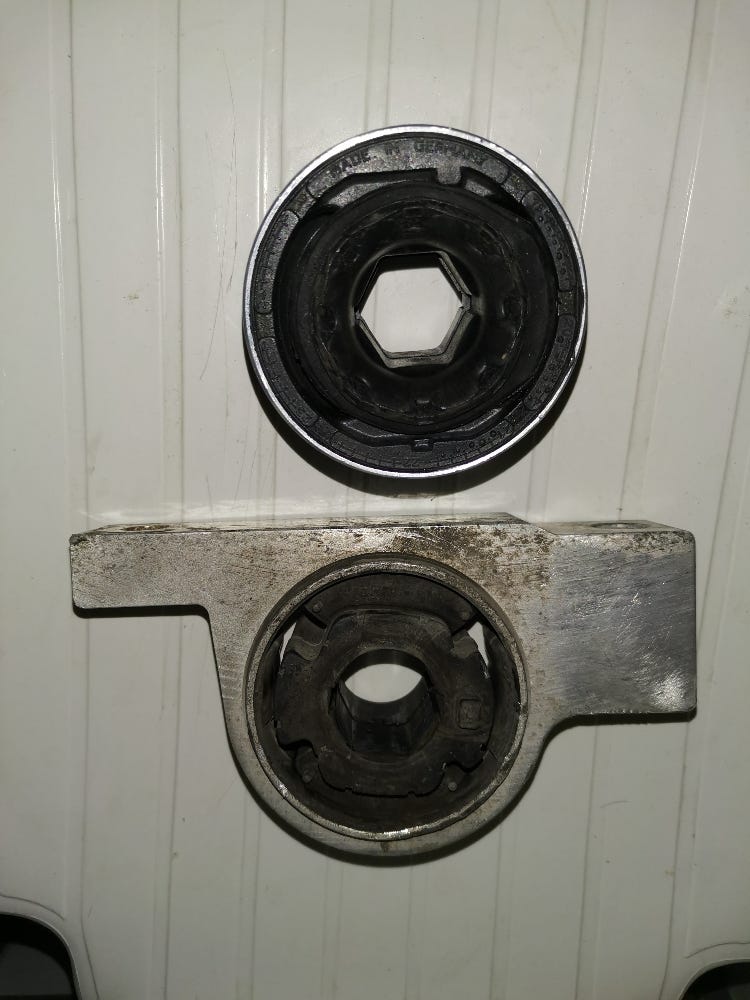
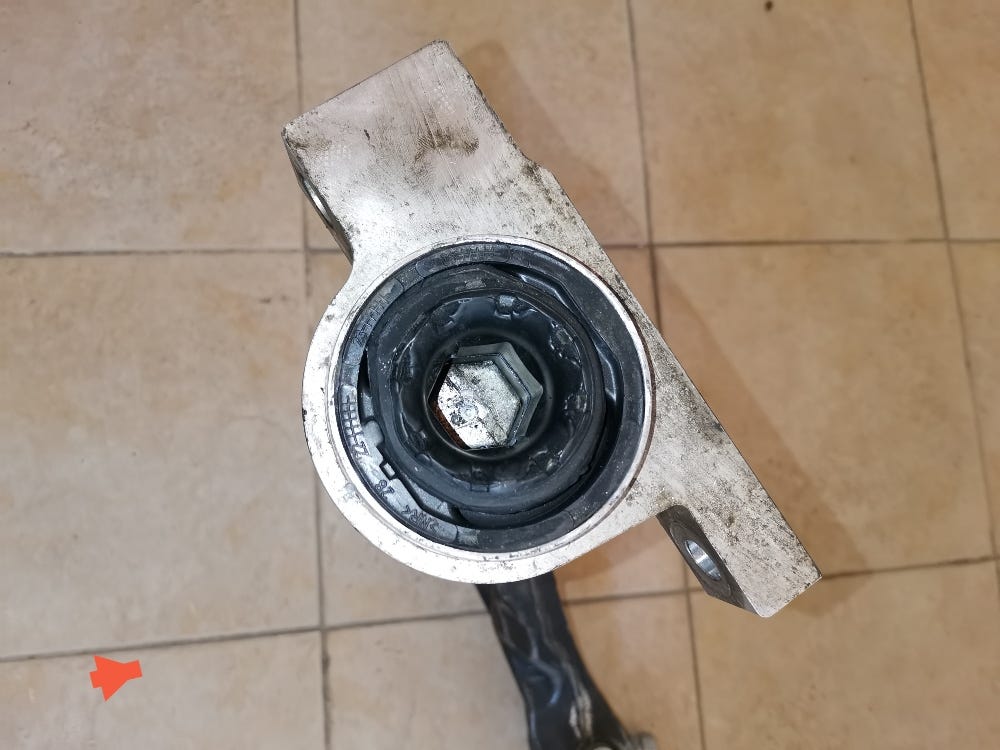
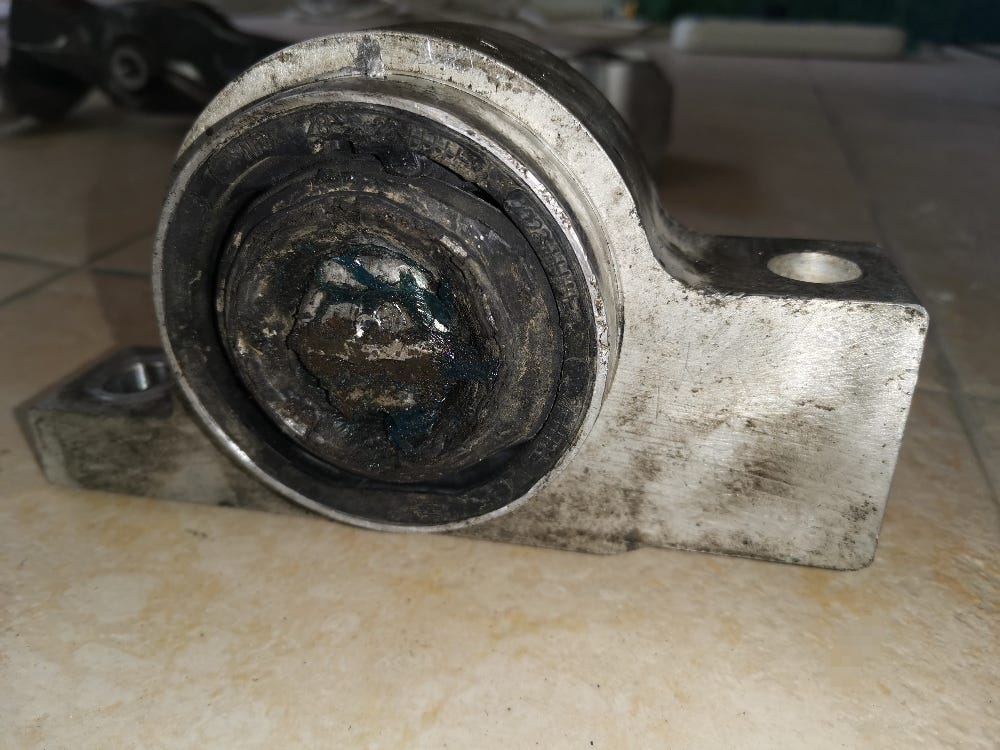
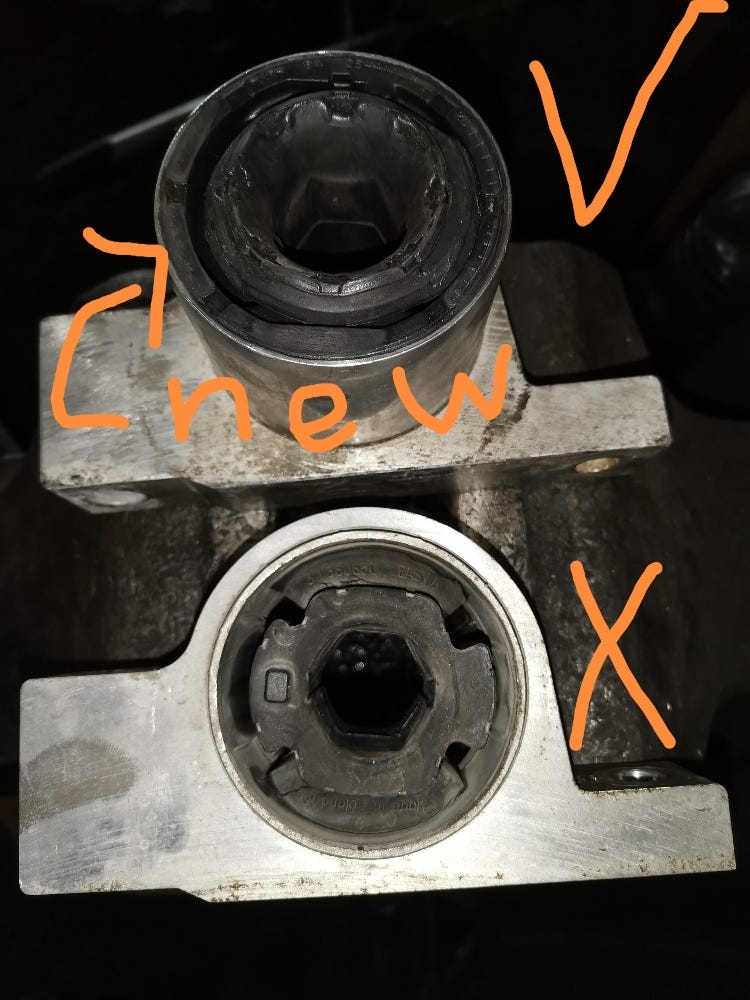
As far as I know, those should fit on all the Volvo SPA line up. If you give your dealer the VIN, they will give you probably the old design bushings. Insist on getting the new design bushings as the new ones are hydro bushings which have better ability to absorb and isolate vibration. The old design can cause some steering wheel vibration as they're sensitive to road imperfections.

New design bushings : 32246809

Old design bushings: 31451032 (garbage)


Tools needed in addition to the basic tools:
1- Jack Stands
2- 8, 10, 13, 15, 18 mm HEX (sockets + wrenches)
3- Torx bits set (T20, T25, T30, T35)
4- 1/2 or 3/8 extensions
5- Impact driver/wrench

Time needed: 4-6 hours per side


Instructions/Tips DIY:

1- Jack up the car (use Jack Stands as support)

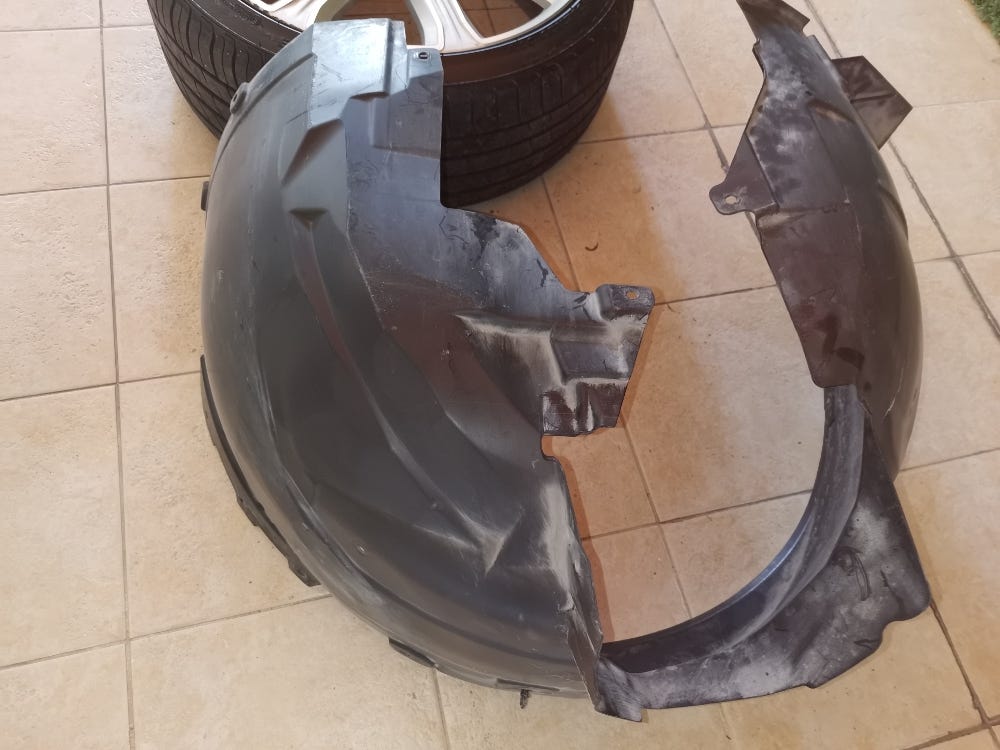
2- Remove the wheel well - around 10 torx screws + 4 clips, if I remember. For the clips, just push in the middle, then pull it off using a flat screw driver.

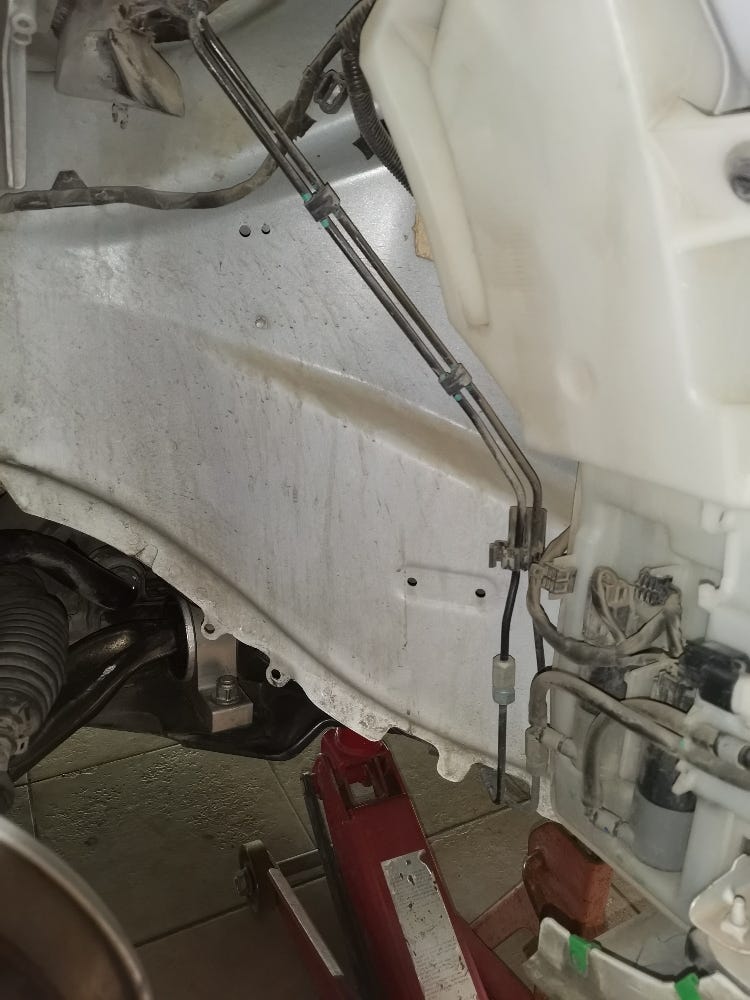
3- Remove the lower splash guard (engine cover) - around 10 torx screws

4- Remove the 8 mm nut holding the ABS sensor wire. DON'T REMOVE THE CONNECTOR FROM THE PLUG JUST LEAVE IT HANGING.

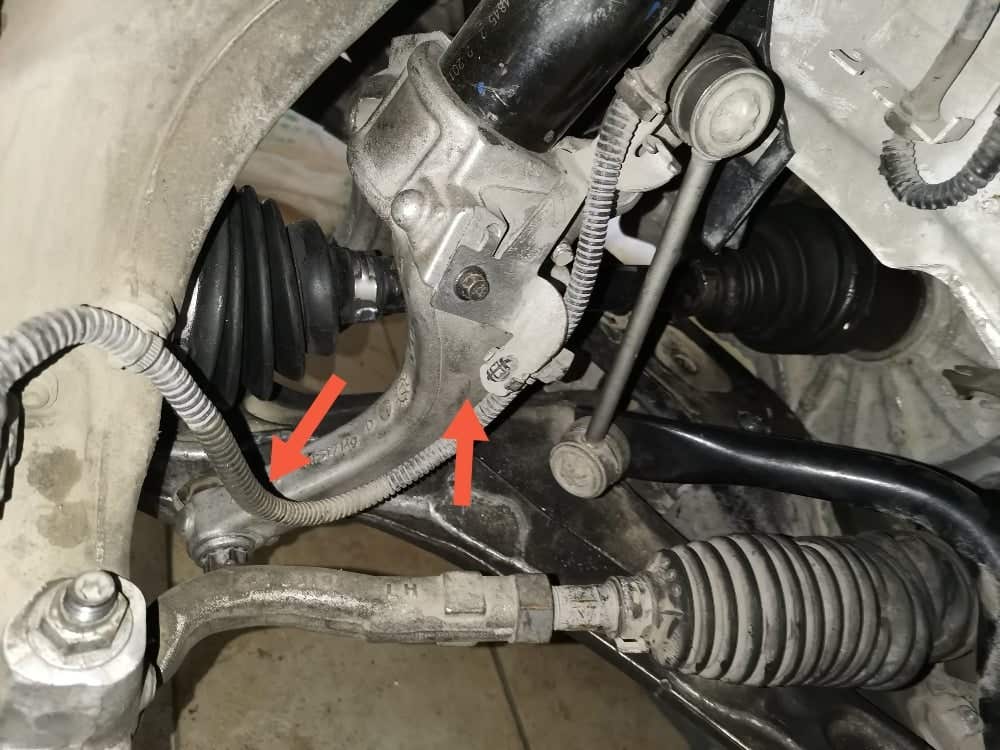
5- Remove the two 15mm bolts at the bottom of the control arm ball joint.

6- Remove the long 18 mm bolt holding the control arm with U shape strut knuckle.

7- Remove the 15mm bolt holding the U shape strut knuckle with the strut

8- Remove the upper 18mm nut holding the end links. No need to remove the lower nut. Remove the link upper side. If you are getting some resistance, lift the hub assembly and it should go out easily.


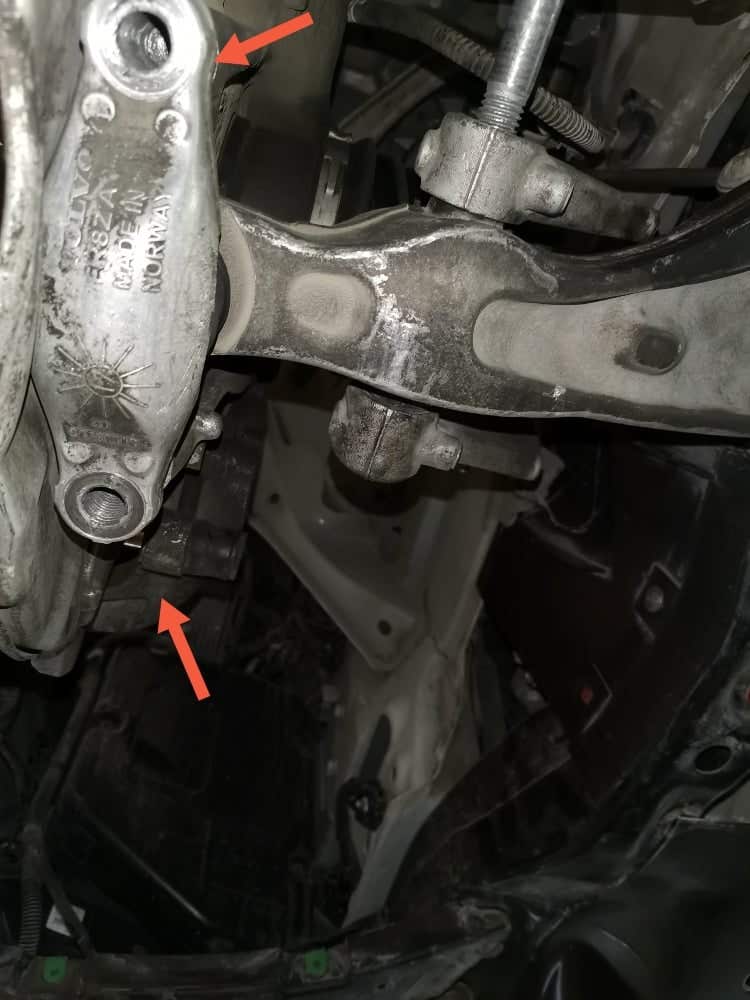
9- Remove the front control arm bolts. Two 18mm bolts accessible from bottom.

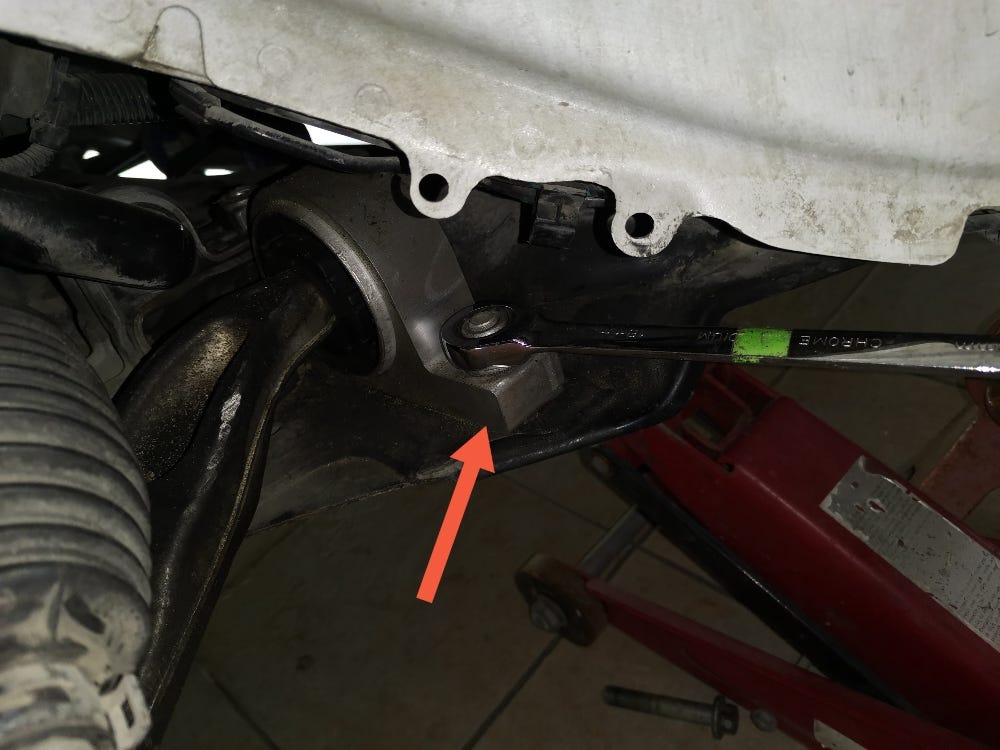
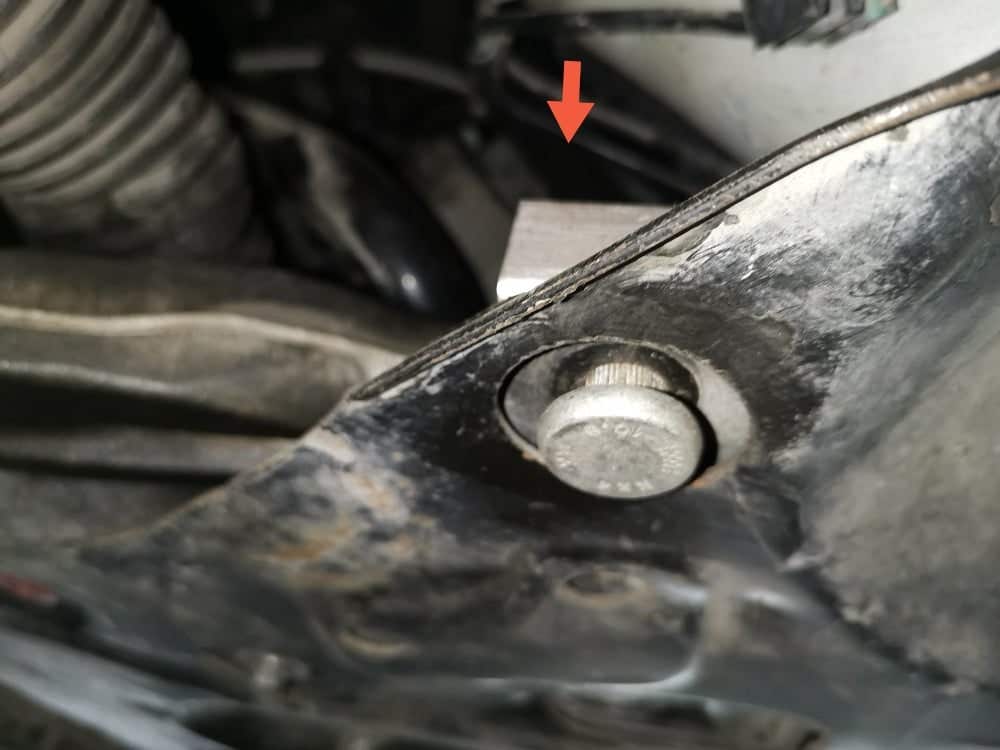
10- Remove the rear control arm bolt/nut/stud. There is one 18mm bolt accessible from bottom. The 18mm nut holding the stud is accessible from the upper area.

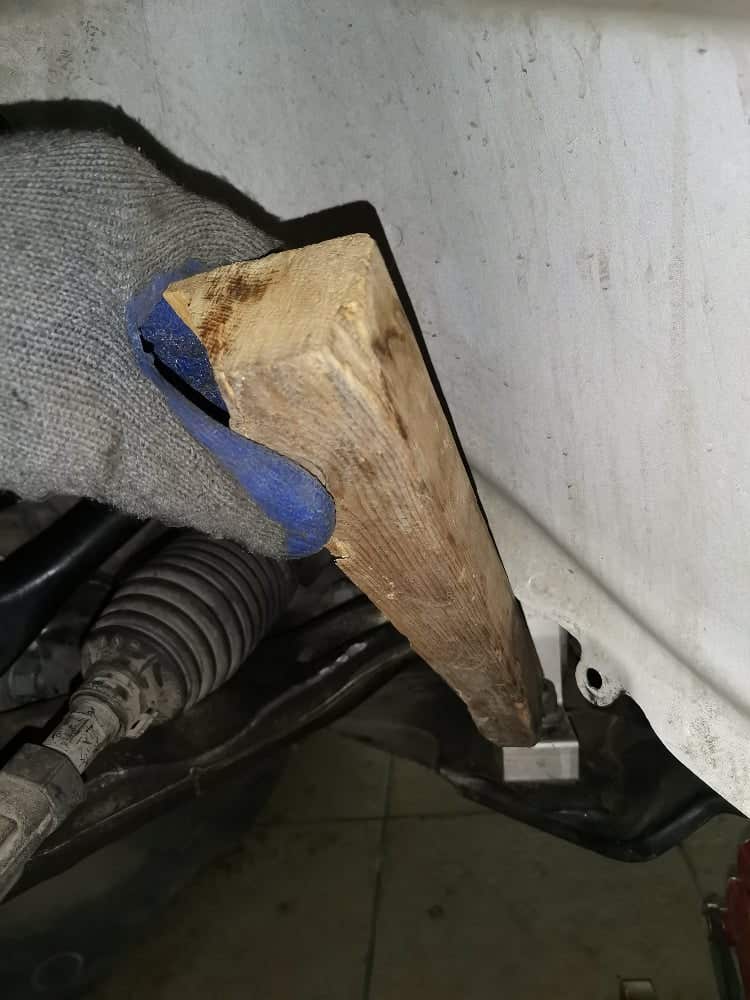
11- Use a piece of wood and hammer to hit carefully the stud. It should go down a bit. Then, you can use a flat screw from bottom to wiggle it and remove it.

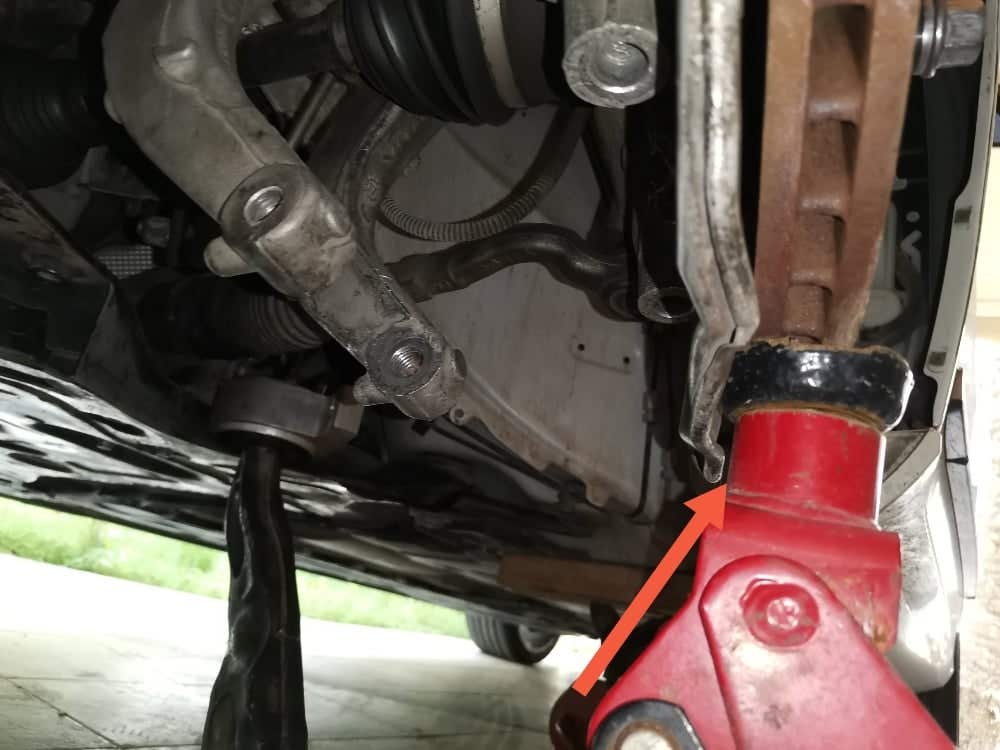
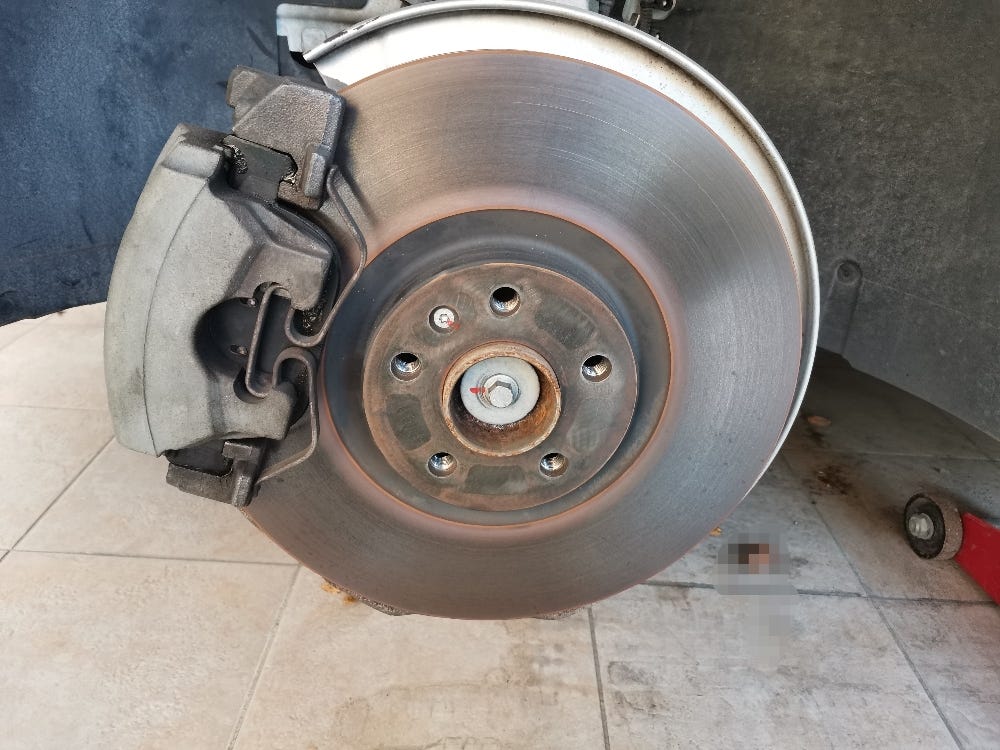
12- Using a hydraulic Jack, lift carefully the hub assembly in the brake rotor area. Ensure you install at least three 19mm wheel bolts before lifting the rotor up.

13- The fun part and where you will require some focus, help, and patience.... You will need to apply some power at different areas in the same time to remove things

De-attach the control arm ball joint using a flat serews. It should come out easily.
Hit the CV axle bolt area in the middle. Use a round piece of wood and hammer.
remove the CV axle from the hub assembly
Push the control arm down
Wiggle the U shape strut knuckle and remove it out.
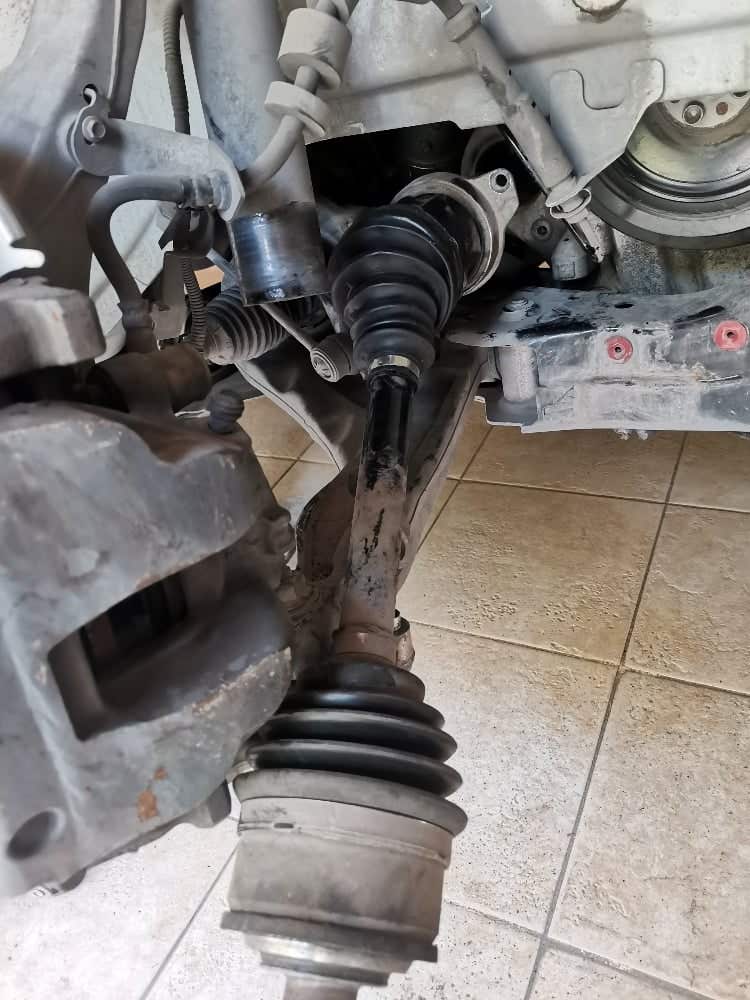
Now just pull the hub assembly out a bit and slide out the control arm.

Replacing the control arm bushings:

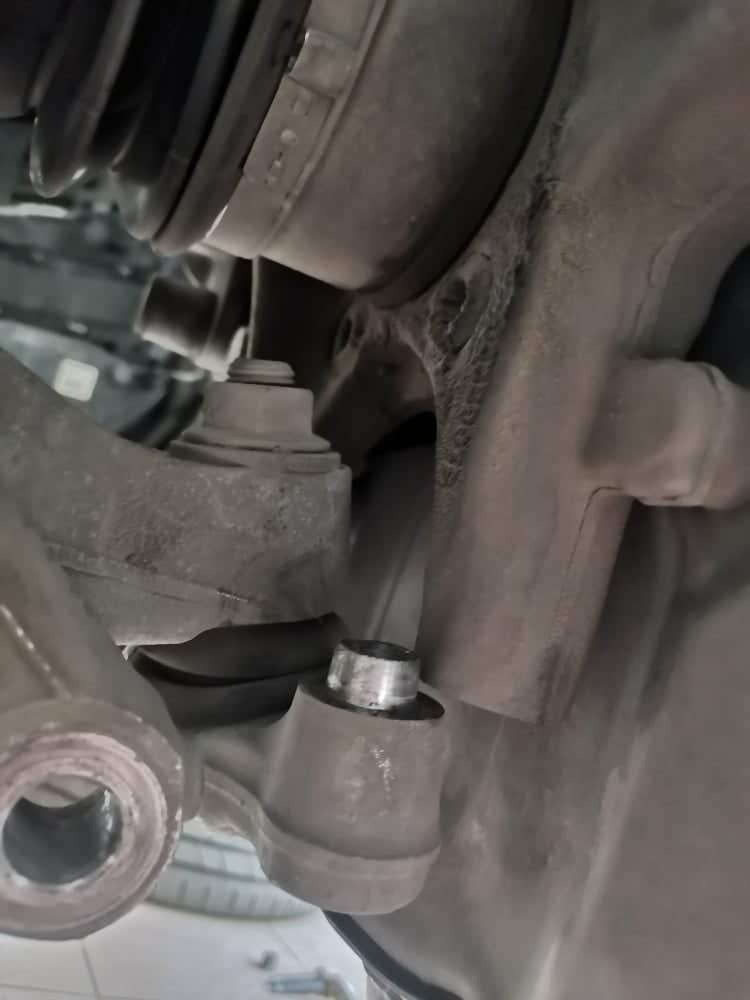
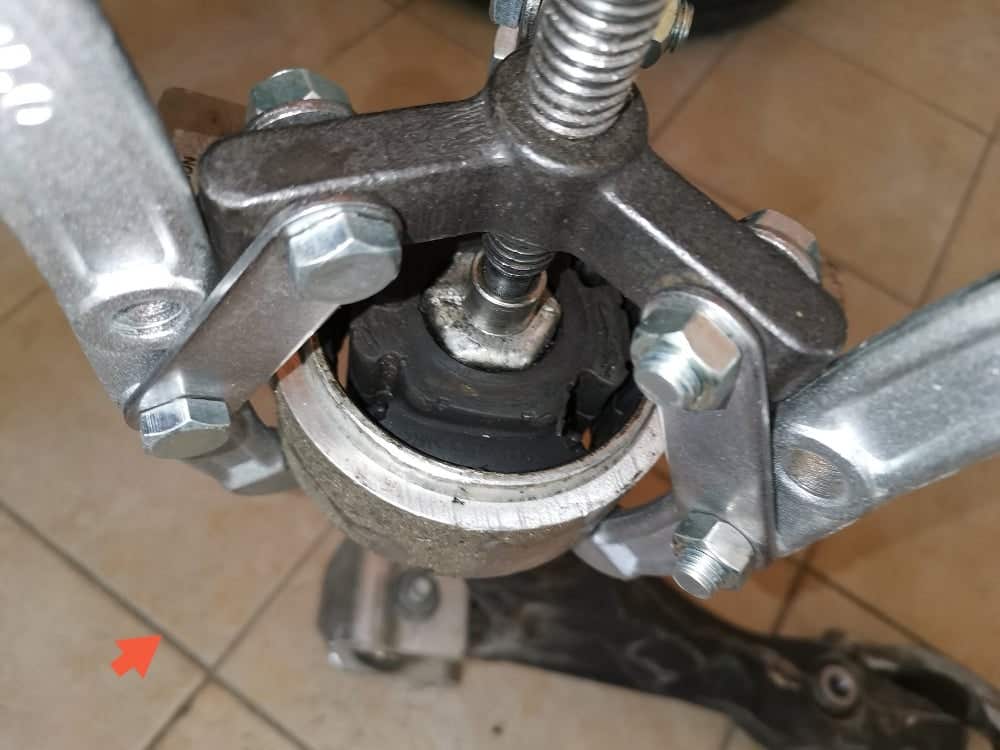
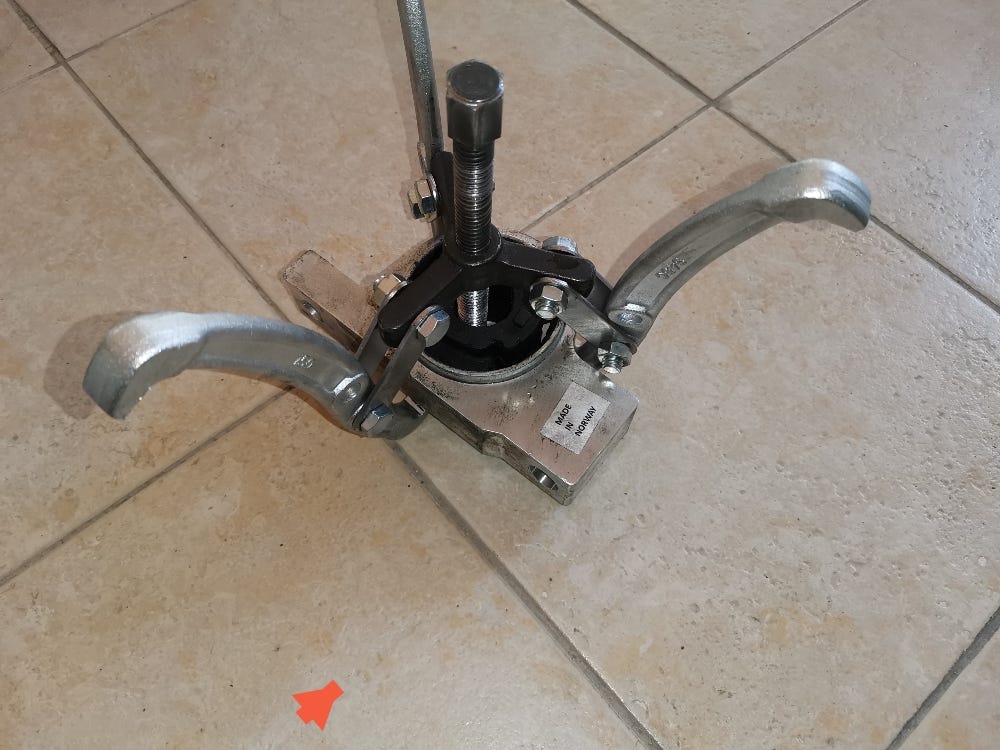
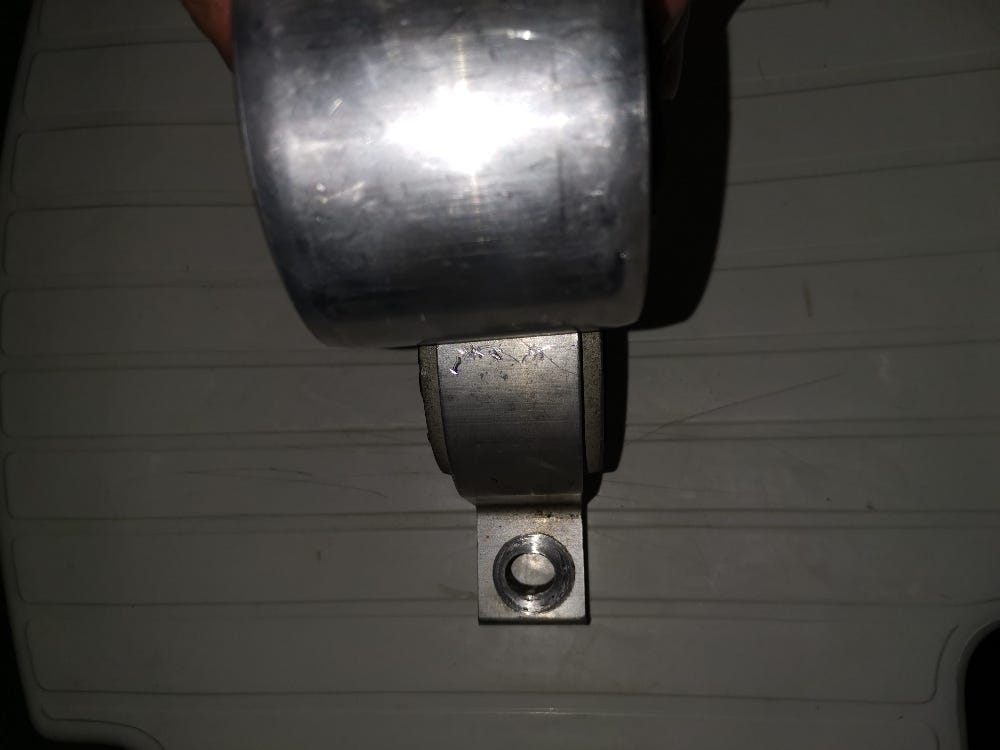
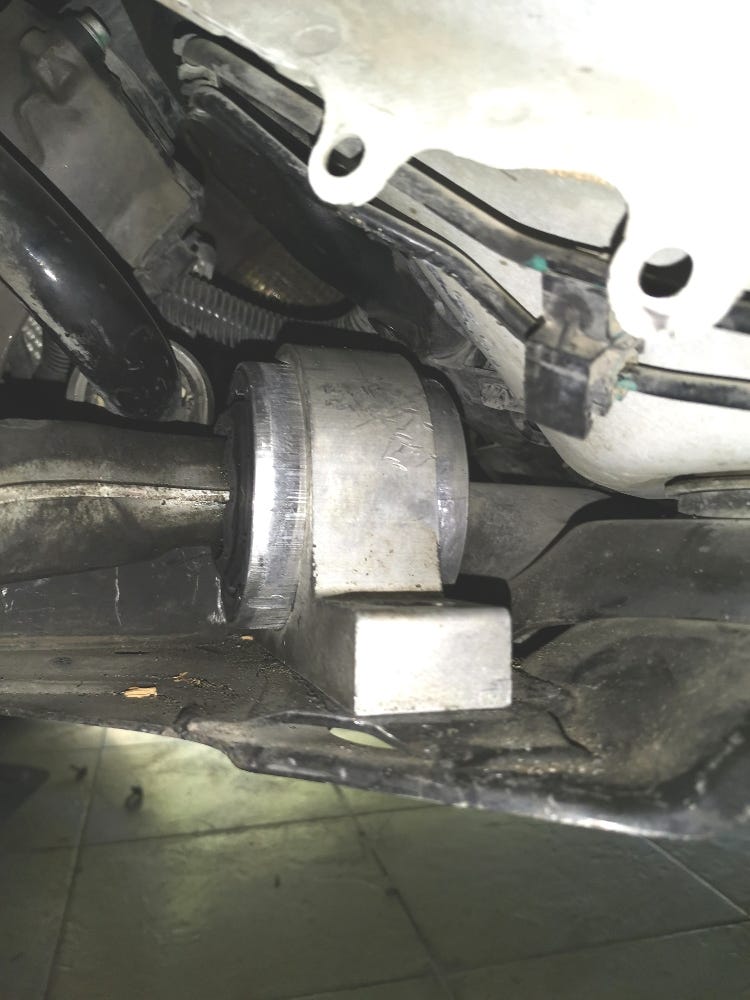
1- Use a bearing puller, pull the old bushing as shown in the picture

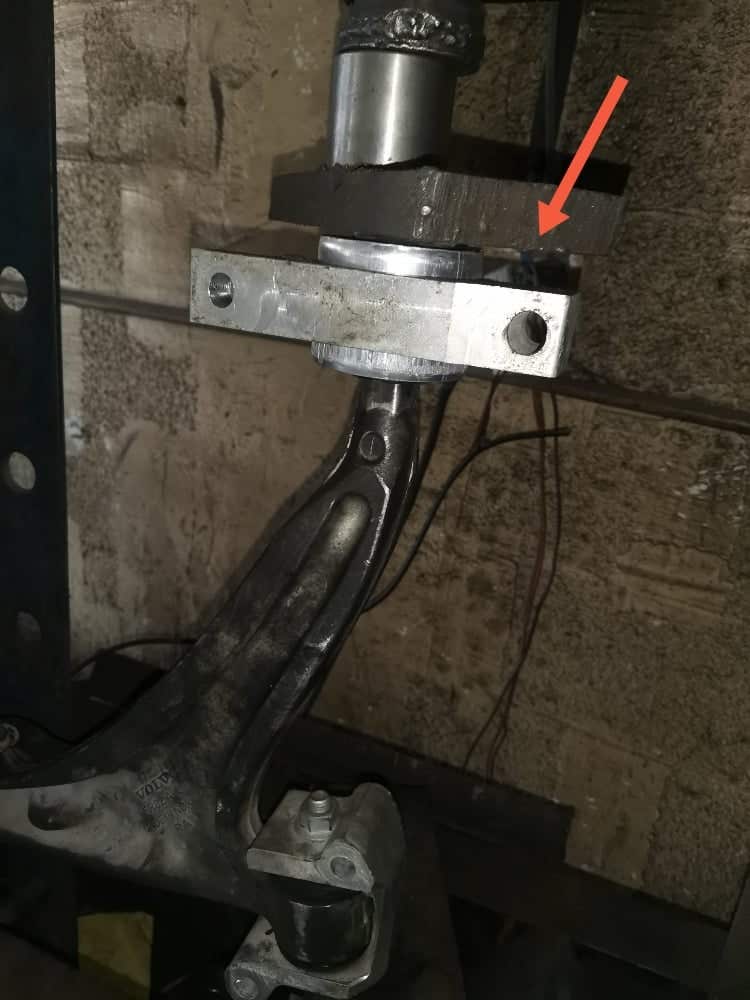
2- Use hydraulic press to push the new design hydro bushings in (New design bushings : 32246809). Important: ensue you don't forget the direction/position of the old bushing.


CV axles replacement:

Right CV axle (passanger side): there are two 10 mm bolts holding the axle carrier. Once removed, the CV axle will slide out easily if pulled.


Left CV axle (driver side): there's a lock insid the transfer case. You will need to pull using a special axle removal tool. If don't have one, you can try to use a big flat screw driver and a heavy hammer to push it out.

End of the story...


Some pictures:
Image

Image


Image


Image
Image
Image
Image
Image


Image
Image
Image
Image
Image
Image
Image
Image
Image
Image
Image
Image


Sent from my YAL-L21 using Tapatalk
 
#4 ·
Night and a day difference. The steering wheel vibration is now gone and the steering wheel feel has improved . The old bushing used to make vibration in the steering wheel.


Old design bushings: like holding things with your fingers.

New design bushings: like holding things with your whole hand. It's giving the control arm a warm hug given its design and larger width/size. Hhhh.


Sent from my YAL-L21 using Tapatalk
 
#5 ·
Yes as you will not need access to a hydraulic press. Remove and install.

If you have a high mileage a car (+80K miles), it might be worth it to replace the whole control arm so you will get new bushings and ball joint. However, it's gonna be expensive.

If not, you will need to do the math to see which option would be cheaper/best for you.

Sent from my YAL-L21 using Tapatalk
 
#7 ·
So, about 4-6 hrs of work on each side, $200 for two new bushings, and $200 for a harbor freight 12 ton press. I'm wondering if I know someone that has a press to cut cash outlay in half... Not sure what I'd do with a press once I bought one. My vibration is minimal, but still noticeable.
 
#8 ·
So, about 4-6 hrs of work on each side, $200 for two new bushings, and $200 for a harbor freight 12 ton press. I'm wondering if I know someone that has a press to cut cash outlay in half... Not sure what I'd do with a press once I bought one. My vibration is minimal, but still noticeable.
Yes to avoid the hydraulic press, buying the whole control arm will be the option.

Otherwise, you can also be more creative on how to push the new bushings in.

I thought of two ideas that might work:

1- Using a torch and applying heat to the control arm head as highlighted in the picture. Then, grease the internal part of the new bushing. With the help of heat and grease, you might be able to push it in using a piece of wood and hammer.

2- Using a ratchet tie down straps. Tie down the new bushings and old bushing. This will create a pressure on the new bushing and will push it in.

3- Using both ideas 1 and 2 at the same time.


Image
Image
Image
Image


Sent from my YAL-L21 using Tapatalk
 
#9 ·
The need to press on the arm is the one thing delaying me to getting to this job, as I need to schedule time at a friend's shop, which allows me to do it on a lift and also he has a press. Otherwise I'd just jack the car up and have at it. Though I could do that and just run down to use the press with the arms I suppose.

Nerd23 I know you mentioned a bunch, are you sure the new arm comes with bushings?? I don't think it does, but only led to believe that by the parts diagrams in VIDA, not really sure.
 
#13 ·
I've completed this job. I did it in the garage, on jack stands, no air tools. It's possible to do, not saying it was pleasant or easy haha. I thought I found a cheat code, I was able to remove and reinstall the driver's side arm without taking the shock fork off. But I could not reinstall the passengers side that way. So best bet is to press out the axle and remove the shock fork. It's tough without air tools in the rusty northeast as impact is the safest to break bolts free. I am pretty experienced with the big-a** hammer to break the bolts free, I had applied penetrant ahead of time to help. The suspension bolts are very tight as one would imagine. Yet still...I broke off a shock fork pinch bolt arrgh. That's the most dainty of the suspension bolts, the others you can hammer all day long. I had to order and wait for a shock fork and bolt. (note for nerds: The shock fork pinch bolt hole comes unthreaded in the fork, it gets threaded by the bolt being installed. The lower shork fork is not that way, it's threaded already. But interesting to note, this is probably mfr cost reduction, threads cut when the part is assembled, which is possible to do in Al alloy. The small holes for brackets are the same, not threaded)

The bushings are not pressed on to the control arm hex with the kind of force that a metal shell is pressed. I was able to rig up a way to press the new ones on the hex. I applied some dish soap to help smooth the way
Image


More notes:

  • Axle does not need to removed from the transaxle/car, just pushed out of the hub. @Nerd23 you may have been already replacing the axle anyways, just a note for others.
  • My part numbers for the bolts and the axle spacer that Volvo specifies need to be replaced are below. I always heed these, probably a bad experience with not replacing "Torque to yield" (TTY) bolts on a head gasket long ago that caused me to have to do the job again. If they need to replaced, it's because the bolts are stretched beyond elastic limits on install, so can't be re-used. This is likely the case as the "Torque plus angle" specs are the hallmark of TTY bolts. Not all of them require replacement though. Cheap enough to buy. I found the right bolt for the inner of the rear bushing, it's under the sway bar in the parts diagrams, it holds the rear of the sway bar bracket down so was listed under that.
Hardware that needs to be replaced and qty:
(2) 30670603 - Rear bushing stud
(2) 985938 - Rear bushing nut
(4) 987605 - Front bushing bolts
(2) 988340 - Rear bushing bolt (stab bar bolt)
(2) 31367618 - Axle shaft thrust spacer

All in all a bit of a pain, but not bad. Bolted joints like the ball joint is nice, rather than needing some special tool or hammering away with a BJ fork for hours. Pushing the stud out was a little bit of a trick, but worked fine whacking away with the big hammer on a lever bar similar to using the wood block, just keep at it, it will eventually just fall out.
 
#22 · (Edited)
Finally you have done it hhhhh.

Yes I confirm that removing the axle is not required and I have mentioned that in my initial post but maybe things got mixed up with the axle removal DIY.

However, for the strut fork, it's a must and will make everything easier. Still force is needed in both scenarios.


Thank you for sharing the additional tips...

What a smart way to push the new bushing on the control arm... Well done!

BTW folks, it's recommended to replace the bolts but it's not required.

For the torque spec, I don't know those and I followed my gut feeling for the torque spec. As long as it's tight, the job is done. Nonetheless, I used blue threadlocker to ensure everything is intact.

I highly recommend every one to use threadlocker for suspension related jobs.


Image


Sent from my YAL-L21 using Tapatalk
 
#14 ·
FYI .. replacement lower control arms are easily found with all bushings and the ball joint for less than $100 complete.
A word of warning though .. I don't know if any of them (multiple mfrs) use a fluid filled bushing yet. If we had a list of vehicles that use this bushing as standard we can likely buy those entire control arms, complete, for around the same price. RockAuto has 3 or 4 different mfrs of them, btw.
 
#15 ·
FYI .. replacement lower control arms are easily found with all bushings and the ball joint for less than $100 complete.
For the SPA chassis? There is nothing on Rock Auto for a 2019 S60. There is for a 2016 XC90, not the right arm for an S/V60 and they are $230 ea, from the picture I can see it's the old design bushing.
 
#16 ·
@Nerd23 and @Power6: Thank you for providing all of these details! I'm cautiously optimisitic that this will reduce/eliminate my vibration as well. Can either of you please post a document with torque specs for reassembling these parts once everything is apart?
 
#19 ·
#20 ·
That's interesting that Riley shows the two newer bushings at the same price point. I was looking at this page where MSRP is different for each part number:

Volvo Front wheel suspension

I'm curious to understand what the "Replacement axle by axle is recommended" means for each of the two newer part numbers?
 
#23 ·
In the context of bolt torque, I found this PDF for front strut replacement in another thread from @p.rico. It is from the P3 instead of the SPA platform, so I don't know how much of this data is relevant for the present job...

Blue thread locker is always a great idea.
 

Attachments

#24 ·
Relevant procedures with the torque specs attached.

I'm just speaking for myself, whatever anyone else feels comfortable with on their own car is OK..
The suspension bolts are torque-to-yield, the ones specified to be replaced would be so as the process can only be done once. The removed bolt is junk, it's stretched. I understand more about these and why they are used, but just to keep it short, if Volvo says replace them I replace them. This is not a case like the brake caliper bracket bolts, where Volvo requires replacement due to the new bolts coming with pre-applied threadlocker, and they don't want to rely on a tech to re-apply threadlocker to the old bolts, they just specify replacement. I re-use the caliper bolts with fresh threadlocker.

I did not use threadlocker on this job as the factory doesn't. Going back though, I might have done that. Not to prevent loosening, when you tighten these babies to the factory spec it's a LOT of friction they are not coming out! Threadlocker is used for bolts where the tightening torque is not enough friction to prevent loosening. But threadlocker is also very useful for preventing corrosion in the threads over time, where the bolts seize. Unlike traditional "anti-seize" it doesn't lubricate the bolt and increase vibration loosening risk. Good for winter climates with road salt.
 

Attachments

#27 ·
I have replaced lower control arms on both sides because car had this abnormal vibrations that were really bad on harsh and fast road. Now that I replaced them it the car feels like new, even small vibrations that I though were normal on low speeds are now gone - it truly feels like a brand new car.

I'm attaching pdf's from volvo vida that you need to follow to replace them. I recommend you to stick to that procedure and remove/replace all parts as per pdf.


Parts: (cca 750$ here in Sweden)

32370929 x1
32370930 x1
plus screws and small plastic part for cv axle but your volvo dealer will include them to you

Image
 

Attachments