SwedeSpeed - Volvo Performance Forum banner

AUX installation on XC90 2006

1 reading
118K views 159 replies 43 participants last post by  Hong Kong  
#1 · (Edited)
Dear friends today I install cheapest solution for all XC 90 and similar
cars without AUX input as Volvo didnt up to my car 06.2006 installing
AUX and also we cant play MP3 CD discs in our units or CD changers
as well.

You need only to sold 2 audio wires cable and ground together on
main radio unit (find it on back roof trunk side) and all photos
is here.

When you need to listen phone music just put radio mode on AM
or FM and voila. When you wont to listen radio just pull plug out
of your mobile phone.

I install this today and its work fine. Now I will just pull one long cable
audio to middle box or you can put also wireless small modules cheap
on ebay.

Enjoy finaly long music from your phones, MP3 Players ect...
 
#2 · (Edited)
Sully, I will place some photos from the begining how to open and find the way to
radio unit. Sorry this is missing of course in my posts but I supose that this is the
basics when someone own a XC90 to enter in this places...not so hidden.

Here is photos from A-Z how to reach all this fuse boxes, radio unit ect...
Yes I already change in guaranty 6-CD changer in 2007 a year after and
this cost in 2007 almost 680 US$.Guaranty of course.
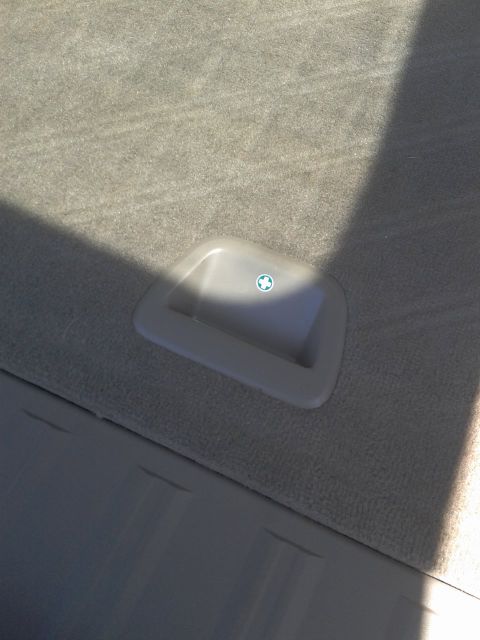
A
Lift cover on the floor with this handle.
Image

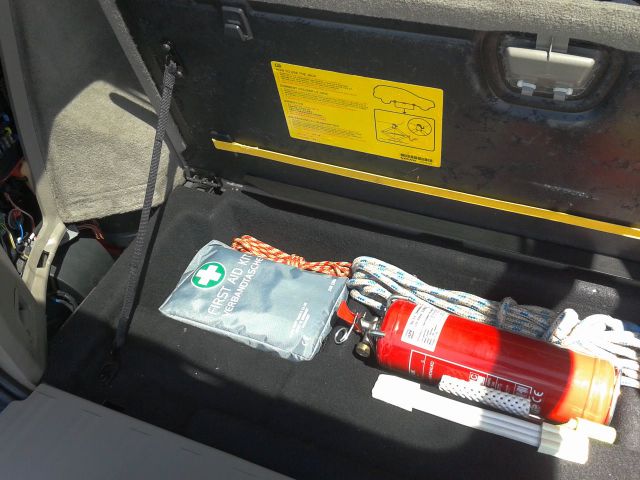
Than depending if you have 7 seats or 5 rise the cover and release safety small black belts as photo
shows.
Image

Image

Image

Than pull UP this traingle cover from polistirol on the left side.
Image

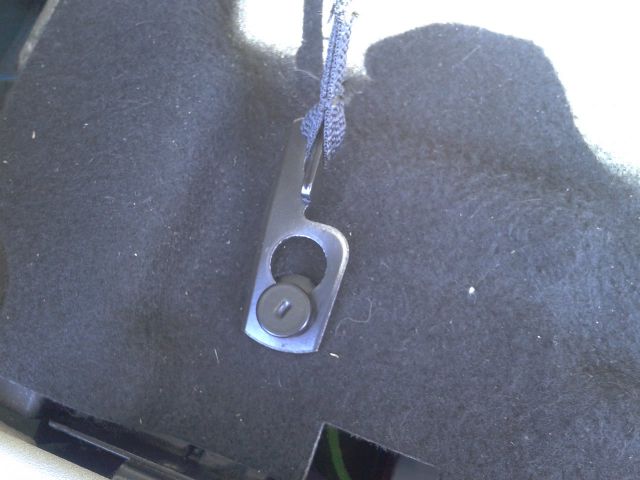
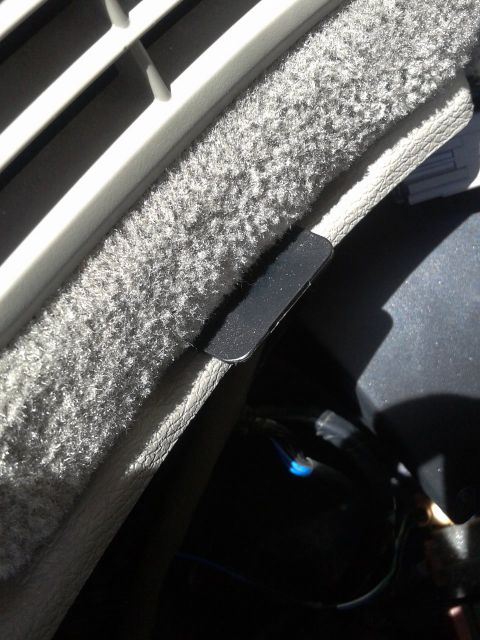
Than you can spot small black level pull it up and remove left cover side.
Image

This level.
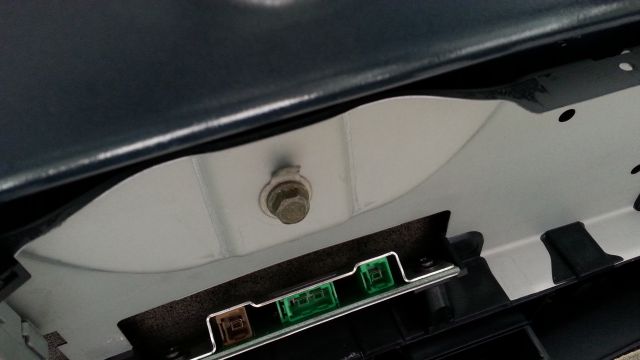
And you will enter in REM fuse box on the right side.
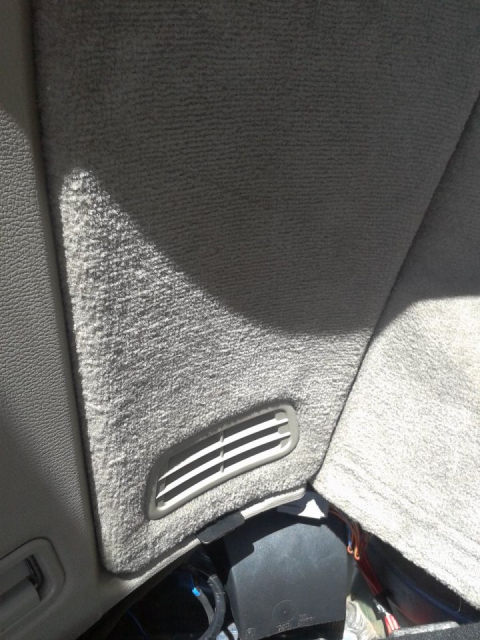
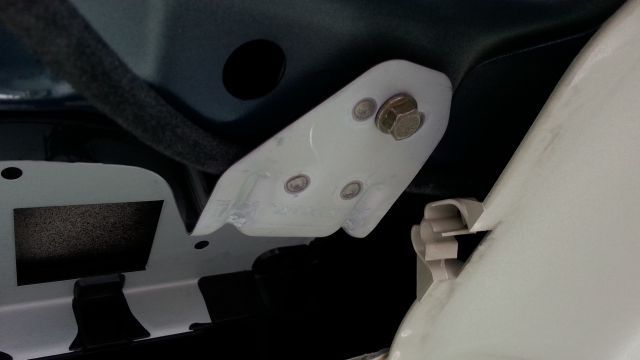
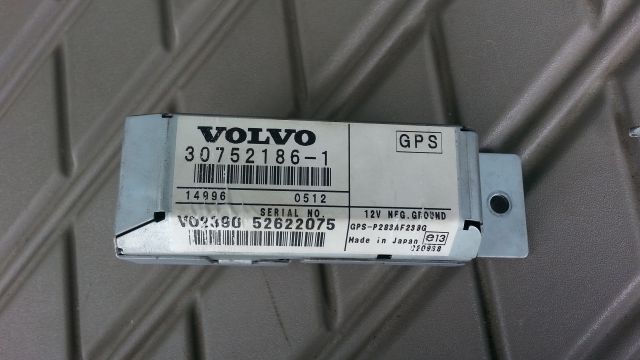
If your car have alarm with movement sensor this grey box must be fixed
on this place or you will have problems with parking on hills. Do not remove
this grey module from his position.
Image

Image


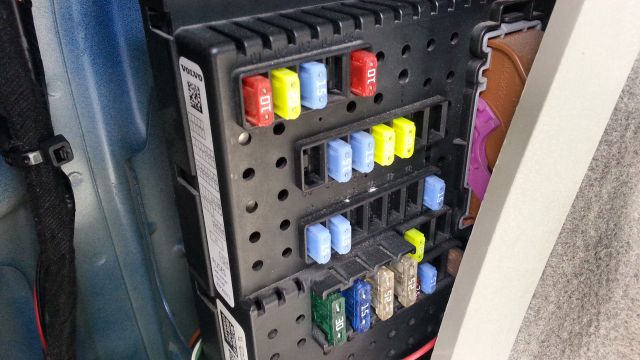
Now you can spot that I removed FUSE NR.6 from top left fuses counting to right and second row first one
is Nr. 6.
Image

Image


First pull out FUSE Nr. 6 on REM on the back side of the car.
From TOP from left to bottom 1,2,3,4,5
6. of 7,5 A

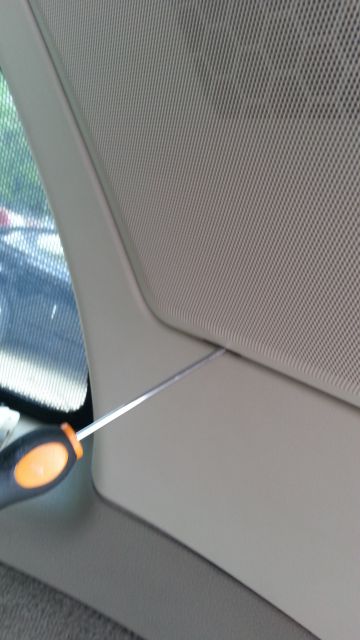
Than pull covers of speakers and just pull left side *no need also right one.
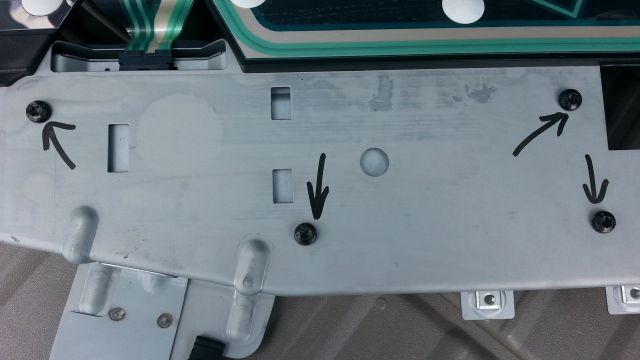
You will find under the roof 2 covers plastic one, please pull it out with small screwdriver,
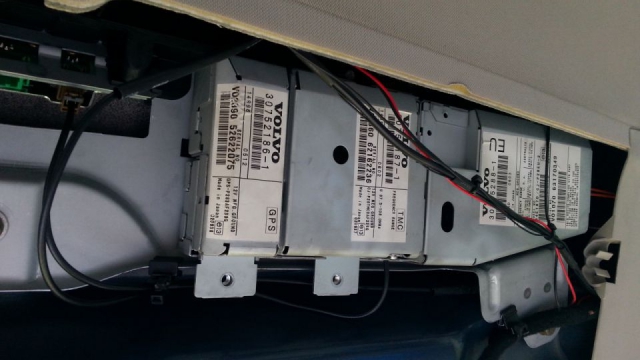
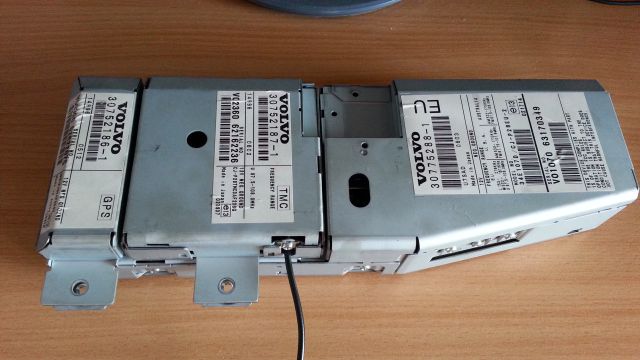
under you can find 2 torx. Simply pull out cover of radio GPS unit.
Image

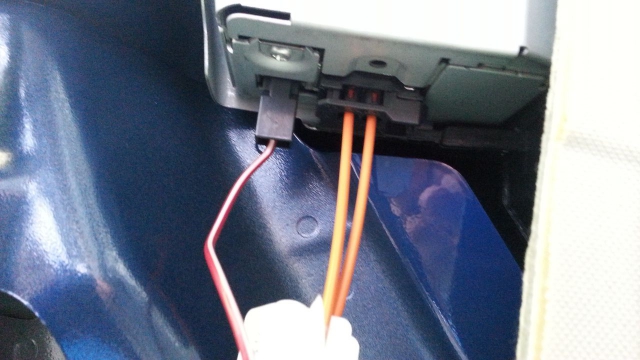
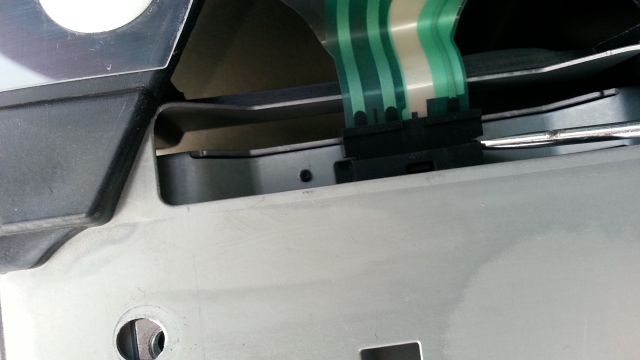
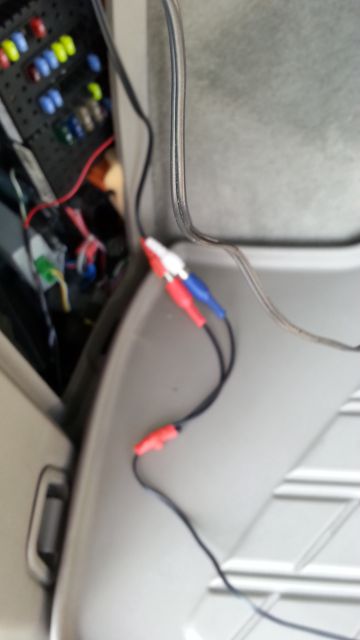
remove connector pushing slightly level down and pull out.
Image


Second instruction starting with removing left cover column and roof cover of radio unit.

When you remove last cover remove 2 plastic cover of plastic covering
inside ceiling (module of radio and antennas)
its 2 torx screw. Than you can pull left column side just PULL out no problems.

Image

Image

Remove the covers and the screws underneath for the rear headlining

Carefully pry off the panel at the rear edge. Use a plastic weatherstrip tool

Pull the rear edge of the panel downwards until the four clips on the top release

If the car has lighting in the panel, disconnect the connector

Pull the panel backwards to release it.

Carefully pull off the D-post panel. Start at the top edge then pull down until the three clips on the inside release. Do not damage the panel

Disconnect the connector on the D-post panel (if the car has a loudspeaker in the D-post, the connector is in the loudspeaker)

Remove the panel by pulling upwards slightly and unhooking it from the side panel.

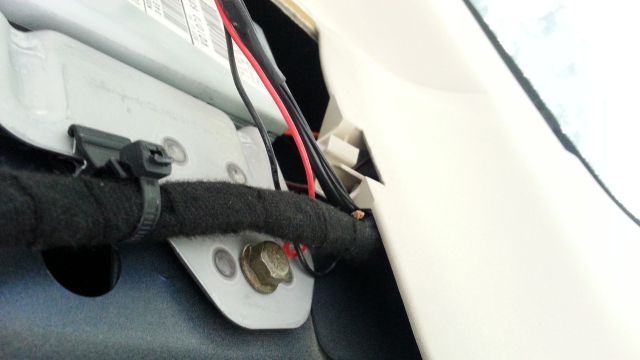
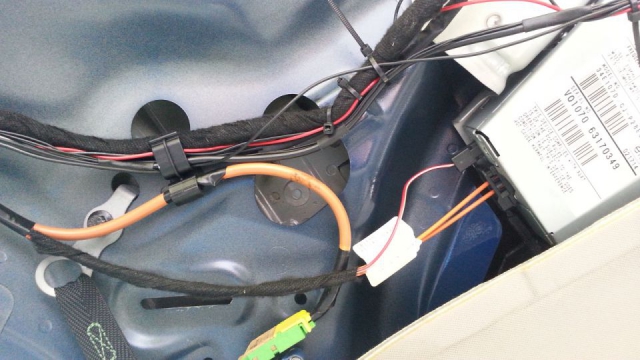
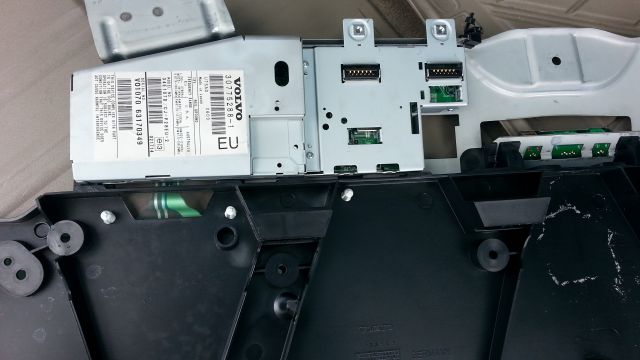
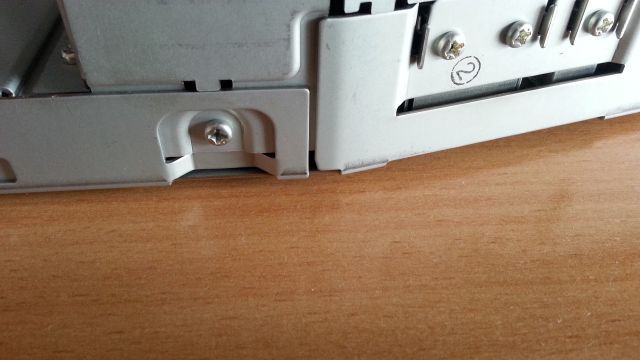
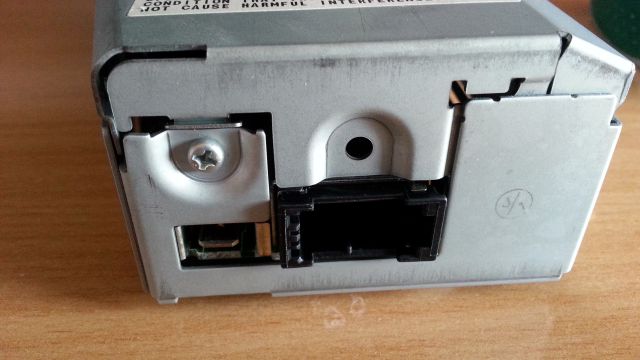
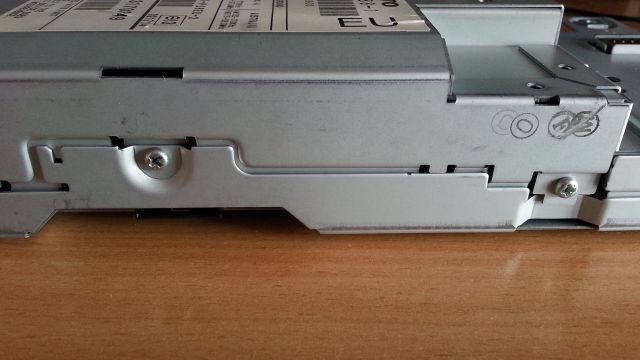
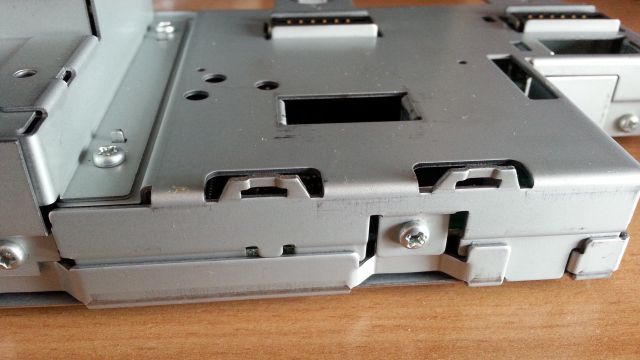
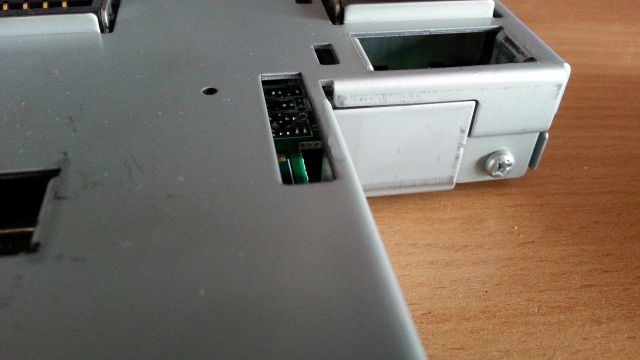
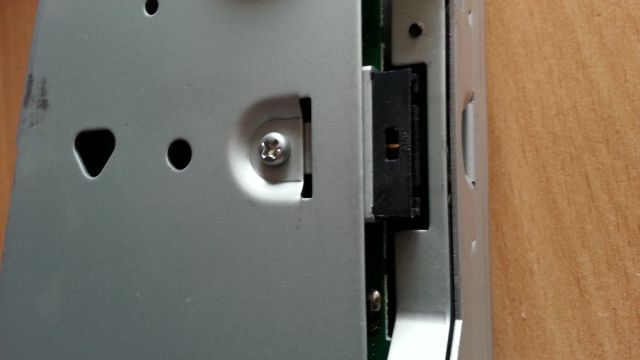
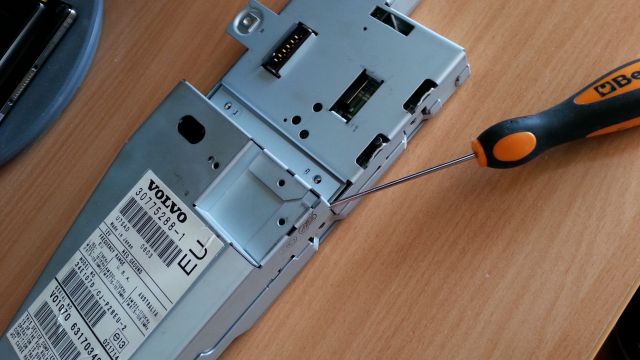
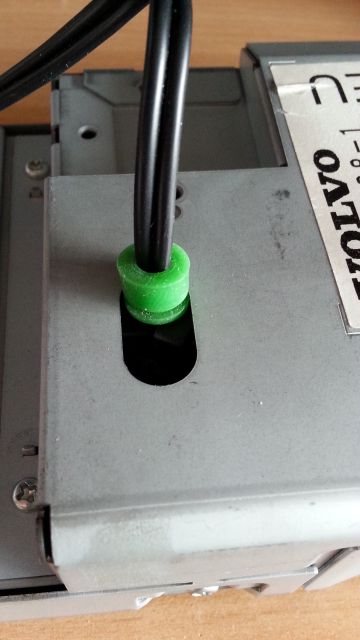
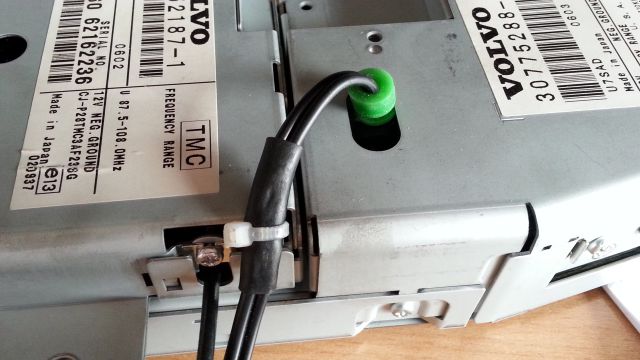
Than take care before you pull everything out to remove all screws 3 pcs.
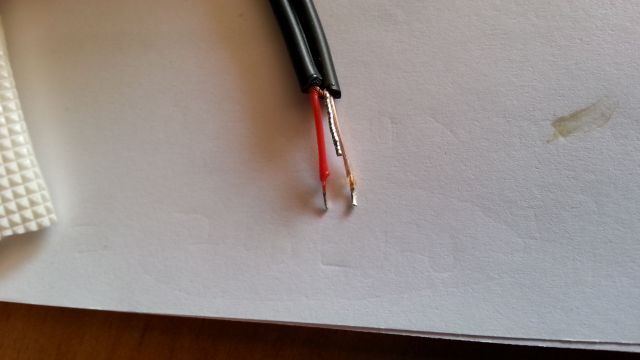
cables and connectors especially optical orange one...
Photo show exactly what to do.
Image


Remove the covers from the rear headlining panel. Unscrew the screws from inside the panels.

Carefully pry off the headlining panel at the rear edge using a plastic weatherstrip tool.

Grip the rear edge of the headlining panel. Pull the headlining panel down until all the clips on the inside release.

Applies to cars with three rows of seats

Disconnect the connector for the rear roof lighting. Pull the panel backwards.

Carefully pull off the top edge of the right-hand D-post panel. Continue down until the three clips have released.

For cars with D-post loudspeakers: disconnect the connectors for this loudspeaker.

Remove the right-hand D-post panel by pulling upwards slightly and unhooking it from the side panel.

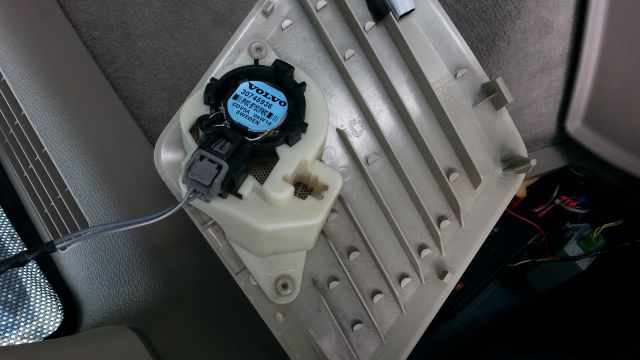
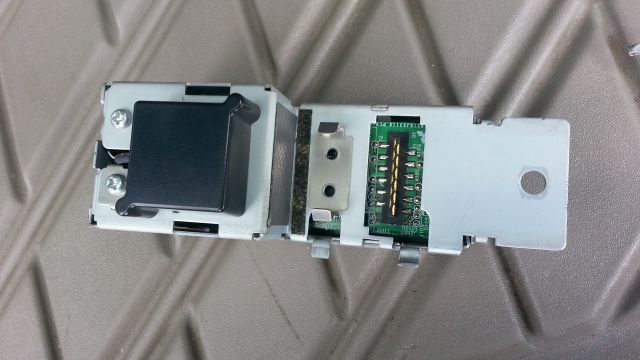
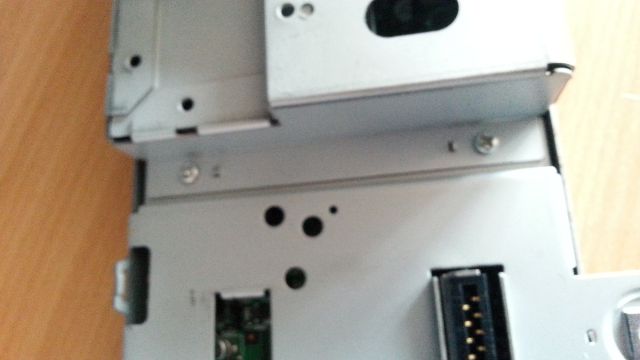
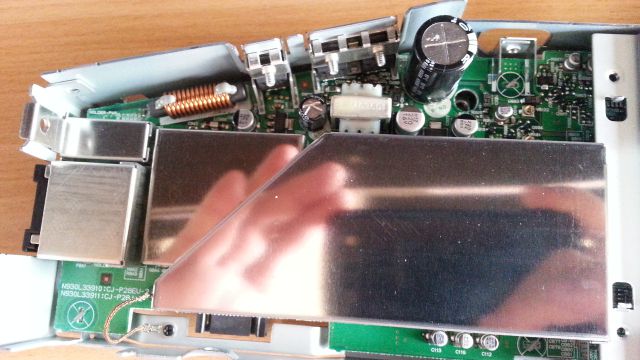
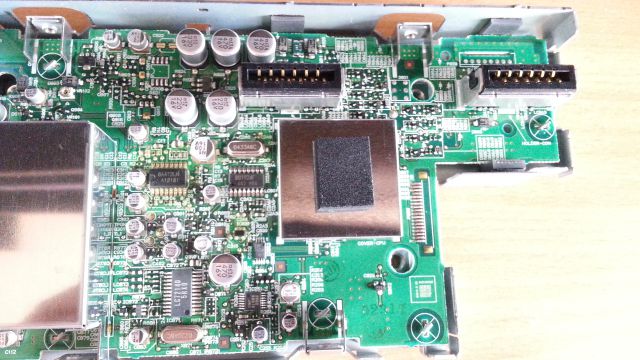
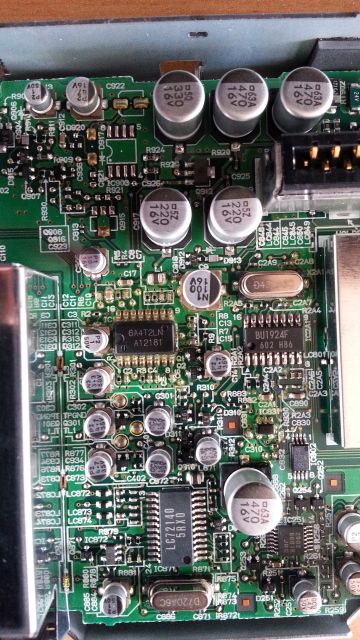
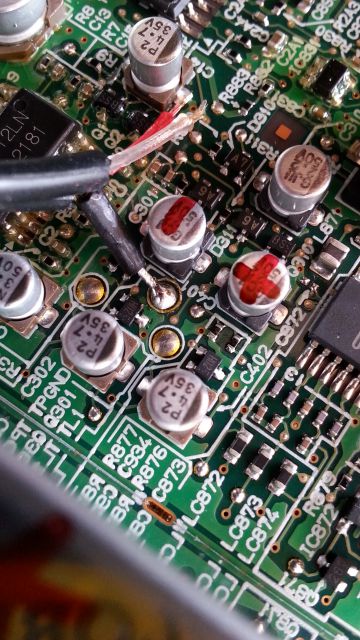
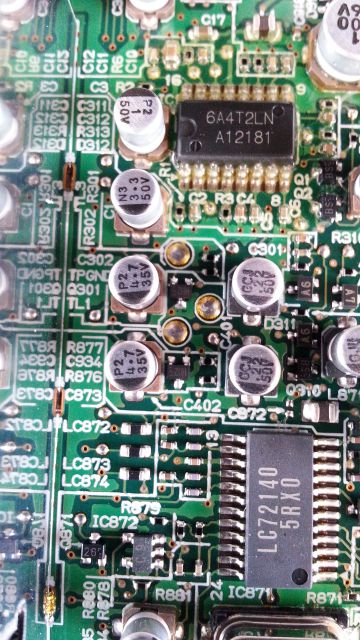
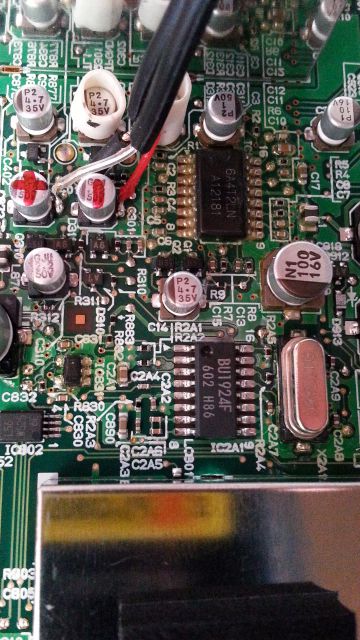
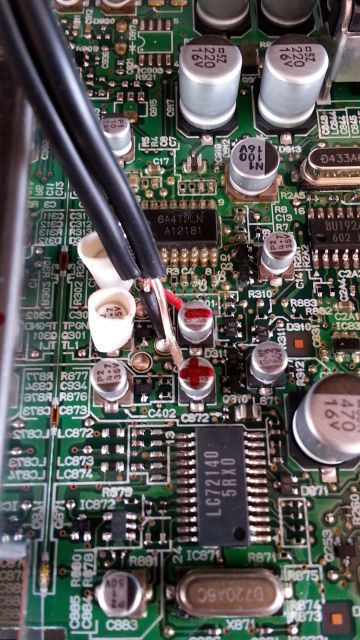
You can spot complete unit. Very nice professional quality made in Japan of course by Mitsubishi.
Image
 
#3 ·
You can remove 2 modules left one is GPS middle one is TMC module but to remove
it you need first to remove 2 screw torx and than middle module first than left GPS one
as GPS have two strange holders on left side. Just pull it out firmly.
Remove 3 screw holding complete unit be carefull to pull out brown antenna cable
from connections of antennas in middle of console.
Image

Image

Image


Cut all cable ties holding cablings - take care to not cut cables or wires.
 
#5 ·
Take care when you pulling out antenna system that you dont touch Air bags
and pull cables of aribags on the left side.
Image

Image

Image

Pull out both modules. TMC and GPS.
Image

Other side you can spot Sattelite antenna.
Image
 
#6 · (Edited)
Than remove this marked torx to release complete unit from antenna board and support.
Image

BEFORE REMOVING ATTENTION !!! PULL OUT antenna flat cable FIRST.
Image

Than remove all screws around box only the 3 holding together inside power transistors NOT.
You can saw 3 screw one by other...near number 2. sticking together. DONT REMOVE IT.
Image

Image

Image

Image

Image

Image

On back side is one taking connector. Also remove it.
Image
 
#7 · (Edited)
Than slightly push up with screwdriver cover UP.
Image

Voila Radio unit is open. VEry high quality components used for Volvo. Nice.
Image

Image

Image


NOW CUT SMALL LINE ON BOARD marked with WHITE DOT from R9 going under the Electrolytic Condensator.
THis to prevent mixing of Radio signal with AUX one later. If you dont cut you will
have background sound of radio. Tested and confirmed. Cut this slightly with some
small screwdriver or scisors...not so deep.
Image

Here marked with RED circle.
Image

Check with zoom lens if small line is cut.
Image
 
#117 ·
Cable Question

You can use Female on one side 2 wires Cinch audio cable. On other side cut cinch and prepare
L and R audio signal wire to be soldered on board. Ground together.

Please let me know what type of cable you started with. I am think a regular RCA white/red. The three connections in the picture are confusing me. I am planning on using headphone extension cable from the pcb to a 1/8" jack female plug for input.
 
#9 · (Edited)
Now first put some tube for isolation of ground to not touch nothing in any case
and sold first ground as photo show on this BIG POINT near this 2 Electrolytic Condensators.
C301 and C 872
Image

Image

Than solder ON + under the 2 Electr. Cond. on the up side L signal and R signal wire.
If you see Electrolityc Condensators you can spot BLACK mark on one part (this is - negative)
and other not marked is + positive (where you need to sold signal wire.)

Maybe my red marking + - on top will disturbe you. DOnt look this RED markings I just mark it to know
which parts are. Photo show exactly that on the right side is + to solder one by one wire.
Take care to have small soldering head to not touch or destroy other small elements and not overheating nothing.
Image

Image
 
#10 · (Edited)
Use only small head of Weller or any soldering.
Image

Image


im suggesting before you place / start soldering wires on board use a little bit
solder on spots as this board is covered by tiny nail polish against moisture.
Touch all points with a little solder wire and than solder wires. Tested.
 
#11 · (Edited)
Use this hole for cable out of box but DONT FORGET BEFORE YOU SOLD TO PUSH THROUGH
cable after Cinch will not pass.
Image

Fix the cable like this. INside the box I put one big cable ties just in case to not pull out cable on installation or
later anyway...
Image

THis is the AUX audio cables. As I didnt have long cable FEmale I put this one but its simple to buy long cable
and pull it to middle front seat box or glove box. But for driver it easy to be in middle box mobile phone than in
glove box.
Image


Image
 
#12 · (Edited)
Put back FUSE nr. 6 put some music on your mobile phone and connect it with simple
earphone cable. I made one for testing quickly.

Now switch main radio unit POWER and put on for example on AM mode as no one use this mode
at all or put on FM mode. You can hear all AUX, MP3 or other music, even your laptop or other
tablets ect...

When you wish to listen radio - just pull headphone cable from mobile phone and voila its working.

I hope that this will save a lot of money for so expensive modules what some producers wont
just for listening music in XC90 from 2002-2006 as from 2007 Volvo install AUX plug in middle box.

Good safe drive. Nice regards Aleksandar.:rave::saber:
Star Wars fighter fighting for rights. Yes I feel good.:deadhorse: They can beat forever but
I will push more and more until morale improve.:whistle:
 
#14 ·
#15 ·
What a great write-up! The 2007+ models all come standard with an AUX input by the cup holders. Mine has it. You could replace your cup holders with one from a 2007 for a stock look to your setup.
 
  • Like
Reactions: Hong Kong
#17 ·
And at the end I think will be the best solution to place mobile phone in some craddle
and I use table Samsung support its prefect with AUDIO out directly from phone
connector and at the same time you just plug in Power car charger.
No need to made any hole or connectors.
Place this cradle in the middle box between seats fix it with some double tape
or similar and place your phone. Voila. Cable audio and power simply entering from bottom.
Image

Image

Image

Image

Image
 
#18 ·
Sorry to ask a 'noob' question here... I am logged in, but cannot see any of the photos in this thread.

I am thinking of trying this procedure, but pics would obviously help to understand what needs to be done.

Any advice???

Thanks.
 
#21 ·
Cabot thanks Im glad to get support...;)
I saw many different metal box for equipment even for harsh enviroment but
Japanese company who produce this for Volvo is high quality especially in metal
enclosure. I remember 20, 30 years back that Japan has perfect industry for small
parts pressed from metal. Just imagine old video-recorders, cameras ect...How many
bended metal parts was inside...and never problems with this parts.
This metal box from Volvo radio GPS unit is also very good.
I worked with Japanese people MHI (Mitsubishi Heavy Industry) and they are the best.:OT:
 
#22 ·
I can view the pics here at home, which is most important!! I guess my PC at work has an issue with IE8 or something...

Thanks! I may give this a try rather than spending $200+ on a new head unit/changer. :)

Take care.
 
#23 ·
Is this write just for the Ocean Race edition of the XC90? I don't believe our 2005 XC90 V8 has these options that you're showing... such as the speaker locations, and location of the fuse panel.

Just curious. Please confirm if you can. I am looking for options to add a USB/AUX input to our vehicle ASAP.

Thanks!
 
#25 ·
This should apply to any 2003-2006 XC90. The speaker locations should be the same in every XC90 with the High Performance or Premium Sound audio systems. I can't speak for the Performance audio system because it was never available in the USA.
 
  • Like
Reactions: Hong Kong
#24 · (Edited)
No for all XC or similar cars with same radio unit up to 2006 maybe just board for USA will have small modifications but you will
find both place for signal like this.

Im quite sure that you have Rem box with fuses in the back side
and even if you dont have rear
speakers this not change nothing
at this installation.
I will put some photos how to remove left part of covers and roof part. But if you check a little on this forum you will find the procedure.
2 plastik cover tap covering torx holding plastic cover of radio antennas unit. This is it.
Or wait and I will place photos.
 
#27 · (Edited)
Thanks Im very happy to get positive feedback as on our local Balkan (Eeast Europe) Volvo forums this is
just group of negative comments coming from dark side of mentality of some people.

Sorry for :OT:
but Im glad that in all this years here many members respect my posts and this is came trust me
only from direct experience on XC90 problems. If you are not experienced in soldering give this module
and cable to some radio-tv electronic shops and ask for 3 min. work. Dont forget to pass first
cable through cover metal box hole with cinch connectors.
Can you imagine MP3 player, Phone, Iphone, tablet
or any sound out giving nice prefered music in car after all this years? Enjoy people.
Hope that this experience help a lot.
I like the car after all this years - this is the main point.

p.s. thanks for comment "nice looking XC90"