

Ok fellas sorry for the repetition, but another noob is looking at saving a 142. 71 to be exact. found it in Aptos, CA since there aren't any here. So while my wife and I were on vacation driving up the coast from LA to SF, i was able to waste a day on the purchase and drive to Oakland docks.
Oct. 1st
![Image]()
![Image]()
Rebuilt b18 as the b20 had a hole through the block when the previous owner got it, single weber, m40. Dark green respray is horrible in real life, rust, seats need work, etc, etc. That said this thing is quiet at highway speeds, drives like a dream, brakes are up there with the best I've ever felt, dash and headliner are amazing for a 44 yr old car. every time i drive her its a pleasure and i feel i couldn't have picked a better project.
I had originally planned on a japanese classic but once seeing/learning about the 142, my mind was made up. the goal for this car is first to restore, 98% OEM, then air suspension and wheels.:facepalm:
just a solid driver, wether to the store for beer, or around the island for shrimp and shave ice, which shouldn't be too hard for the 142, at least that was the initial thought.
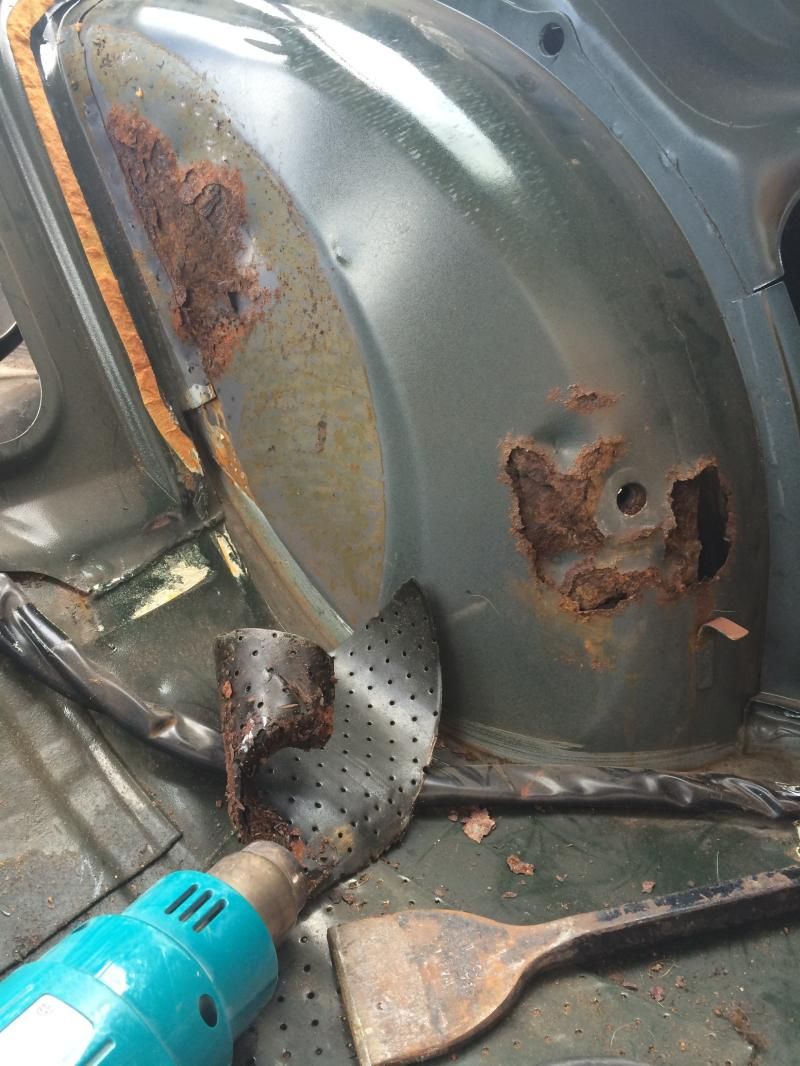
So first thing first, this damn rust. the seller didn't mention it in the ad, so when i found rust at the rear shock supports, lowballing was a green light, of course i didn't mention I'm a welder/fabricator for a living. door jambs looked great, drip rail over the windows looked great, so i assumed it was just the common upper shock mounts. of course i was wrong.
took delivery on the 2nd of nov. got her to the shop[my job] and found more at the seatbelt supports
![Image]()
btw the shop next door with the toyota out front, he does 4x4 builds but to pay the bills he does insurance repairs, one of the best body guys in the island if not the best under age 35, so tools, and invaluable insight is always right next door.
![Image]()
![Image]()
![Image]()
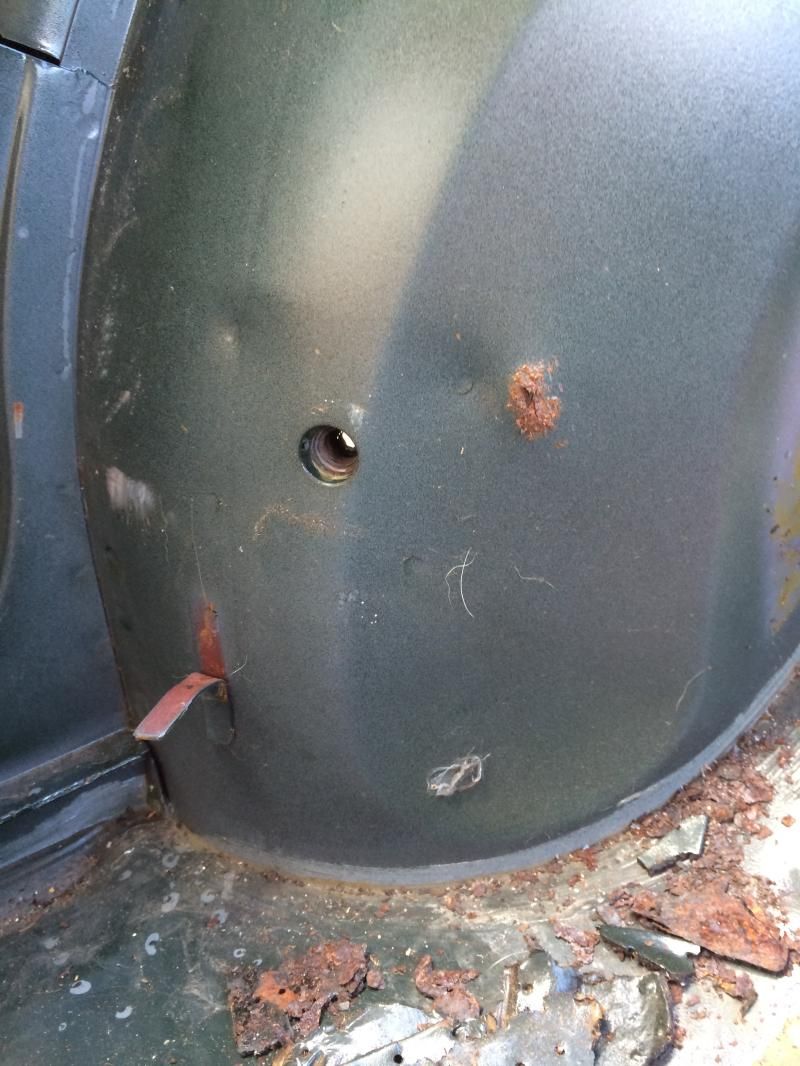
passenger side seatbelt support
![Image]()
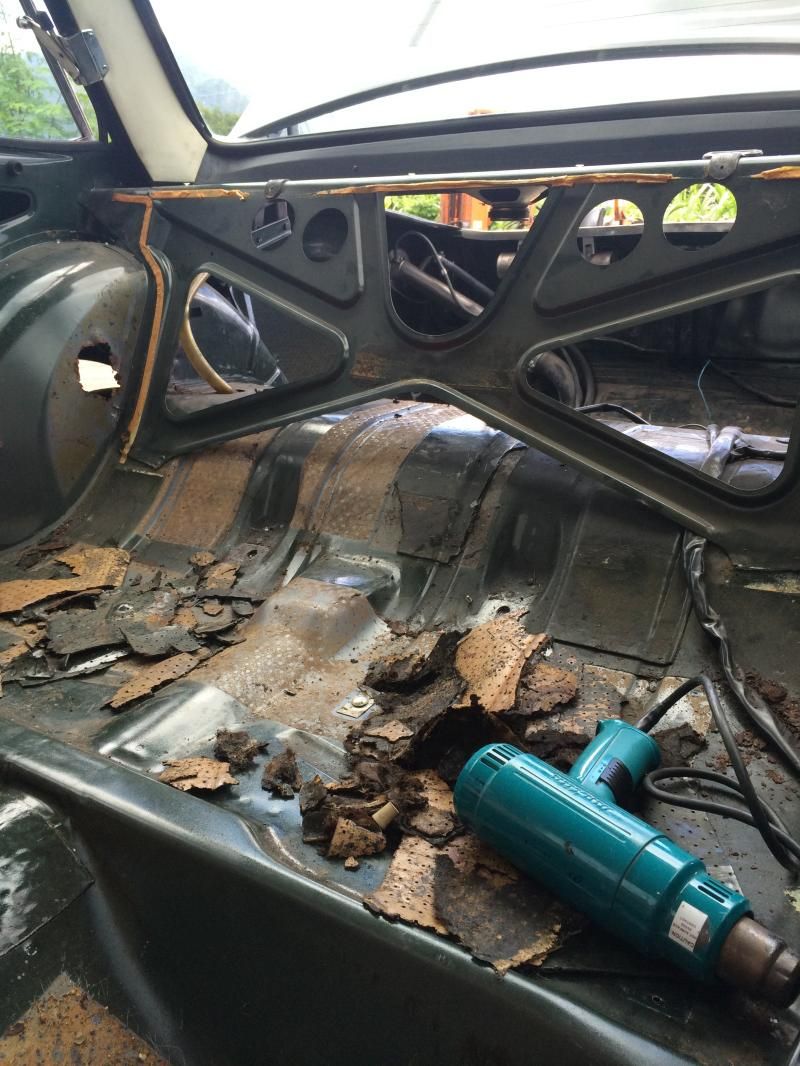
stripping stuff
![Image]()
on the drivers side water was getting in to the upper shock mount since it was rusted through, it would run down the fender well towards the front of the car, collecting on the floor pan.
![Image]()
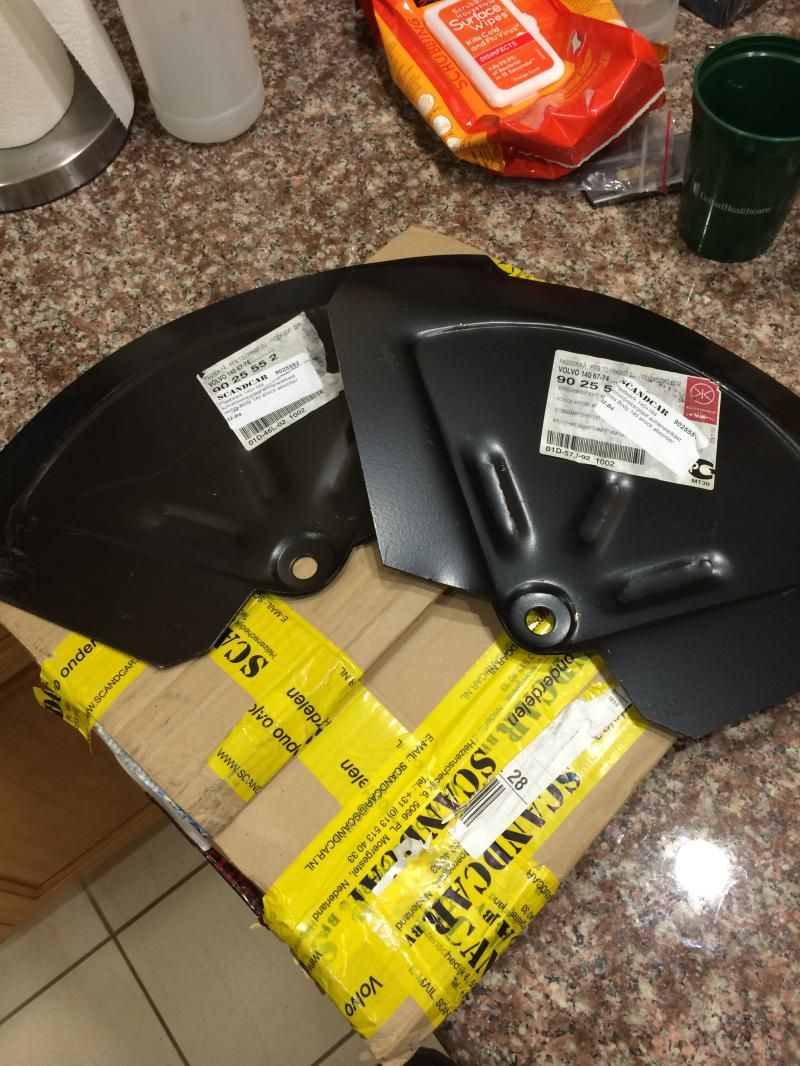
bought some stuff
![Image]()
![Image]()
found more on the quarters where it seams with the rocker panels[below the rear windows] no pictures but i figured that will have to be phase 2 of the rust repair, tackling the shock mounts, seatbelt supports, and floor pan was more than enough for my first time. So the thanksgiving weekend i was free friday through monday, got everything ready and went to work
started cutting
![Image]()
![Image]()
![Image]()
this is what 3 hours of hammering on a beanbag looks like[first time and the steel thickness is overkill but its free]
![Image]()
and patched up
![Image]()
![Image]()
floorpan patch[needs another for the pinholes in the area, took care of the seam first]
![Image]()
things were working out so i got bold and went ahead and removed the spare tire wells
![Image]()
![Image]()
![Image]()
so everything has been seam sealed inside and out, covered with either por15 or rustoleum paint before undercoating.
put some seam sealer in the remaining pinholes in the floor pan and quarter panels. and took her home to research the next round of rust repair.
to be cont. tomorrow
Oct. 1st

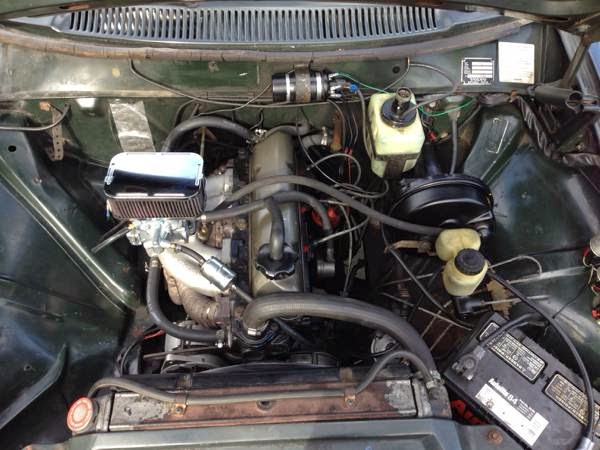
Rebuilt b18 as the b20 had a hole through the block when the previous owner got it, single weber, m40. Dark green respray is horrible in real life, rust, seats need work, etc, etc. That said this thing is quiet at highway speeds, drives like a dream, brakes are up there with the best I've ever felt, dash and headliner are amazing for a 44 yr old car. every time i drive her its a pleasure and i feel i couldn't have picked a better project.
I had originally planned on a japanese classic but once seeing/learning about the 142, my mind was made up. the goal for this car is first to restore, 98% OEM, then air suspension and wheels.:facepalm:
just a solid driver, wether to the store for beer, or around the island for shrimp and shave ice, which shouldn't be too hard for the 142, at least that was the initial thought.
So first thing first, this damn rust. the seller didn't mention it in the ad, so when i found rust at the rear shock supports, lowballing was a green light, of course i didn't mention I'm a welder/fabricator for a living. door jambs looked great, drip rail over the windows looked great, so i assumed it was just the common upper shock mounts. of course i was wrong.
took delivery on the 2nd of nov. got her to the shop[my job] and found more at the seatbelt supports

btw the shop next door with the toyota out front, he does 4x4 builds but to pay the bills he does insurance repairs, one of the best body guys in the island if not the best under age 35, so tools, and invaluable insight is always right next door.


passenger side seatbelt support
stripping stuff
on the drivers side water was getting in to the upper shock mount since it was rusted through, it would run down the fender well towards the front of the car, collecting on the floor pan.

bought some stuff

found more on the quarters where it seams with the rocker panels[below the rear windows] no pictures but i figured that will have to be phase 2 of the rust repair, tackling the shock mounts, seatbelt supports, and floor pan was more than enough for my first time. So the thanksgiving weekend i was free friday through monday, got everything ready and went to work
started cutting


this is what 3 hours of hammering on a beanbag looks like[first time and the steel thickness is overkill but its free]

and patched up

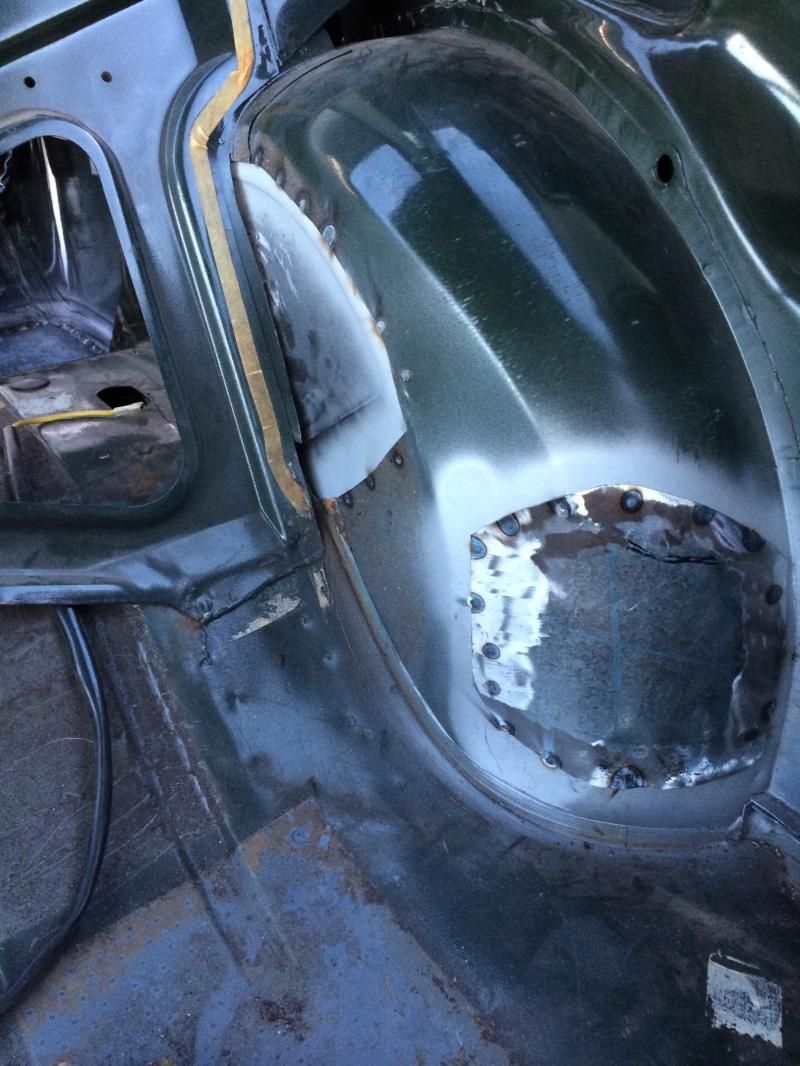
floorpan patch[needs another for the pinholes in the area, took care of the seam first]

things were working out so i got bold and went ahead and removed the spare tire wells


so everything has been seam sealed inside and out, covered with either por15 or rustoleum paint before undercoating.
put some seam sealer in the remaining pinholes in the floor pan and quarter panels. and took her home to research the next round of rust repair.
to be cont. tomorrow


,-Pneumatic-Pin-Derusting-Gun.jpg)


