Post #1000. Woohoo! OK, celebration over.:beer:
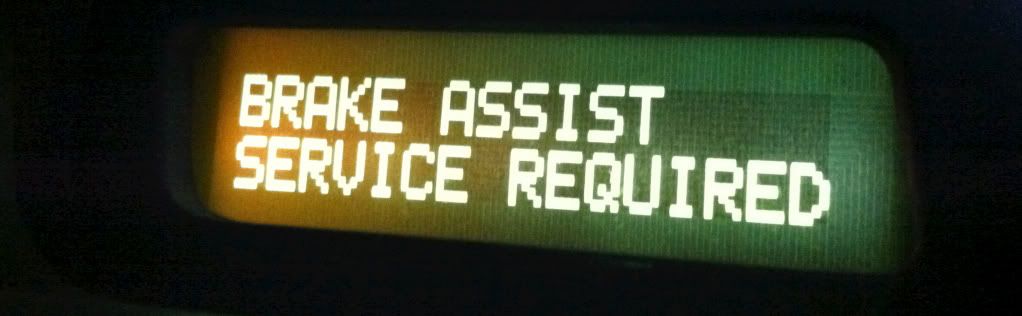
After starting this thread: Linky: Please-help-diagnose-grinding-noise-from-rear-axle-area-(video), the consensus was bad wheel bearing. I also had two faults displayed on the message center:
23629
![Image]()
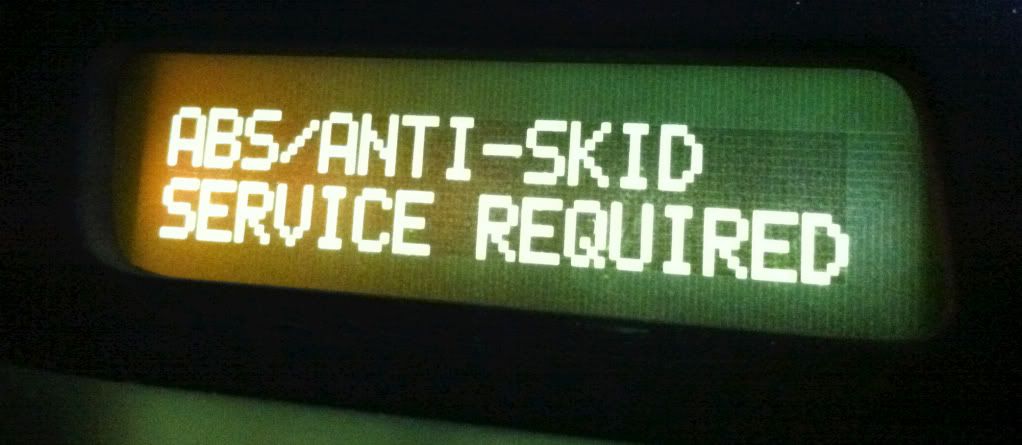
23630
![Image]()
After reading many, many threads, I pieced together the knowledge shared by many. Here are some of those threads:
1. linky: For-all-you-hub-rear-wheel-bearing-lovers
2. linky: How-to-Install-a-rear-wheel-bearing
Here goes.
Tools:
- Metric socket set. Standard and deep depth. 3" extension.
- Small persuader (sledge hammer), e.g. 3 lb.
- Rubber mallet or dead-blow hammer.
- Cold chisel.
- Jack stand(s).
- Hydraulic jack.
- PB Blaster.
- Patience.
- Heated garage (optional, but rather helpful in the cold weather).
- Loud music.
- Heavy duty nitrile gloves (mine are 6 mil) - keeps the hands cleaner.
Parts:
- Rear wheel bearing (hub) 31340690 - I obtained my OE from the dealer parts department.
- Splash shield kit - included with bearing.
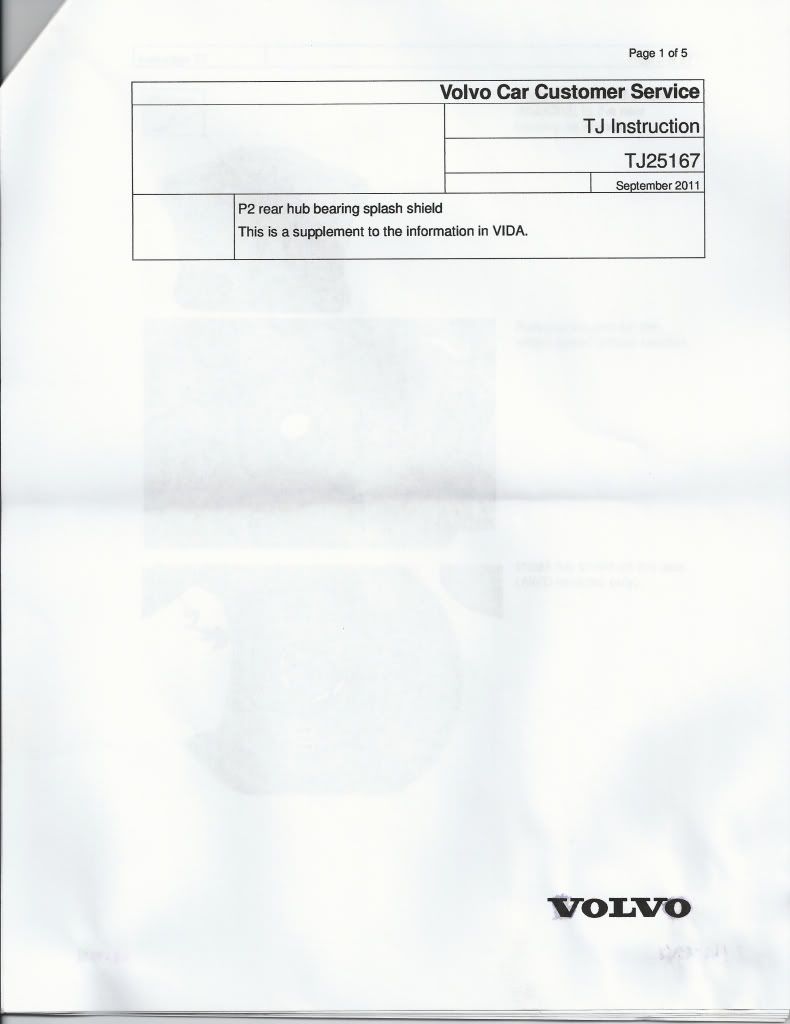
- Technical Journal TJ25167 (Sept 2011) P2 Rear Hub Bearing Splash Shield Instructions
- Brake shoe kit - 31262869 because my shoes started to delaminate.
- Wheel speed sensor - 30773743 because my sensor was broken from excess movement in bearing.
- Parking brake springs - because I was replacing the shoes.
PG01
![Image]()
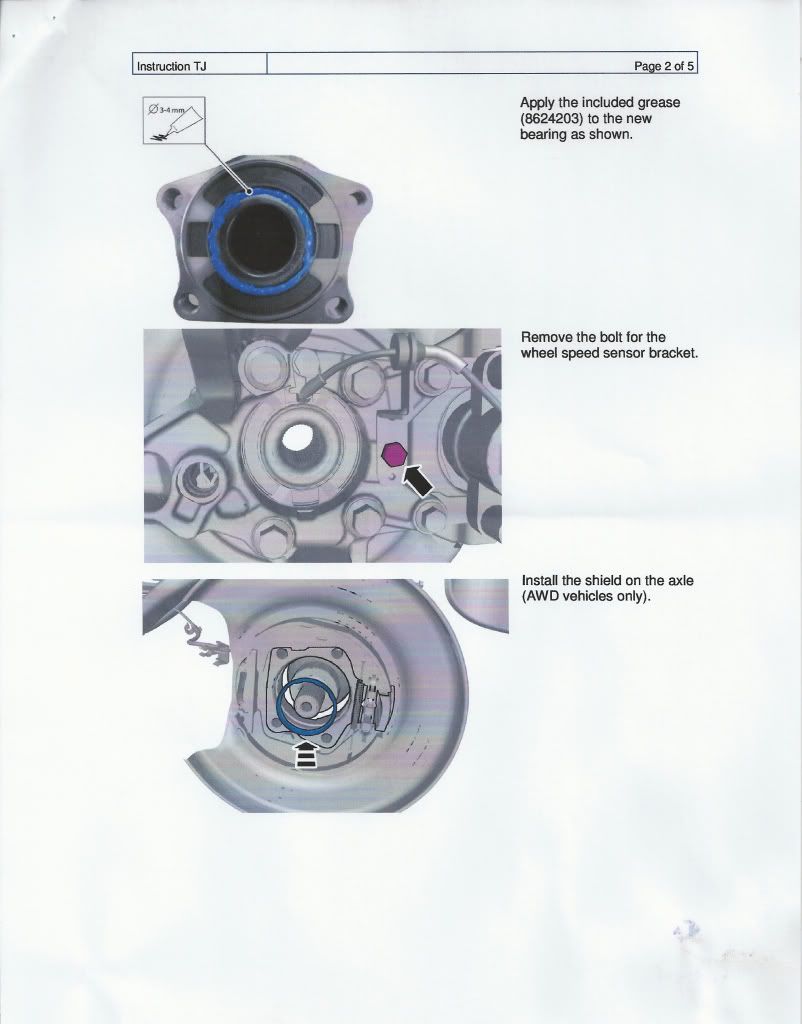
PG02
![Image]()
Notice the orientation of the "teeth" on the inner diameter of the shield, and the pointy protrusions on the inboard edge of the shield.
PG03
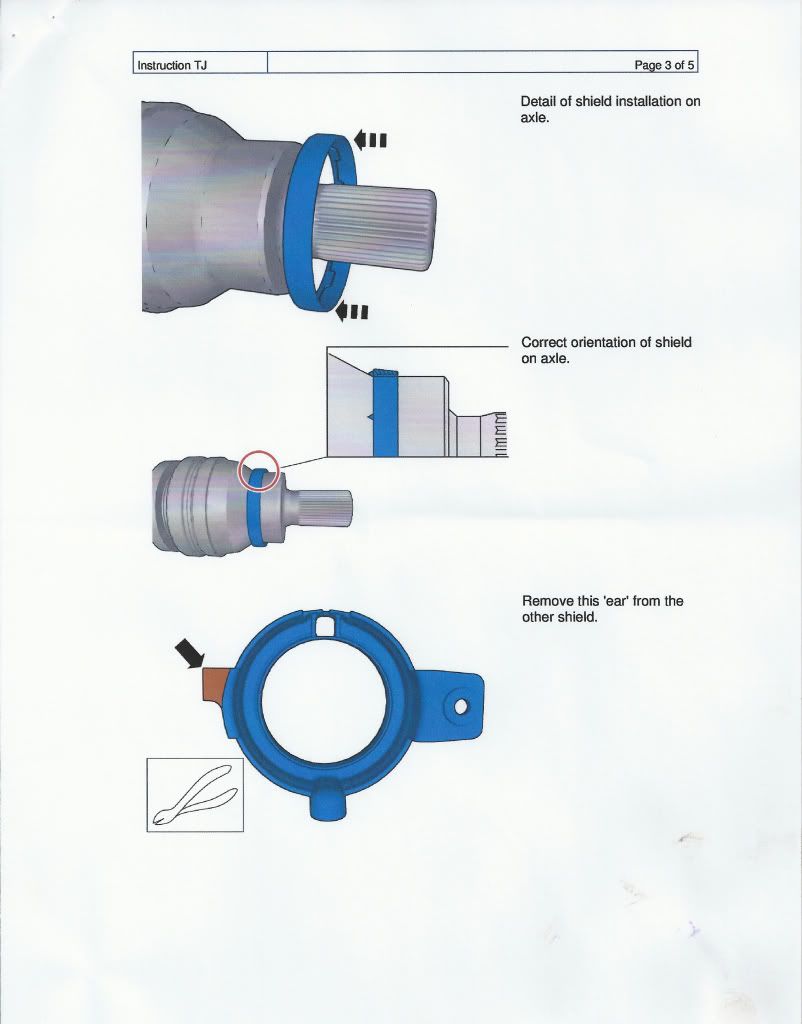
![Image]()
PG04
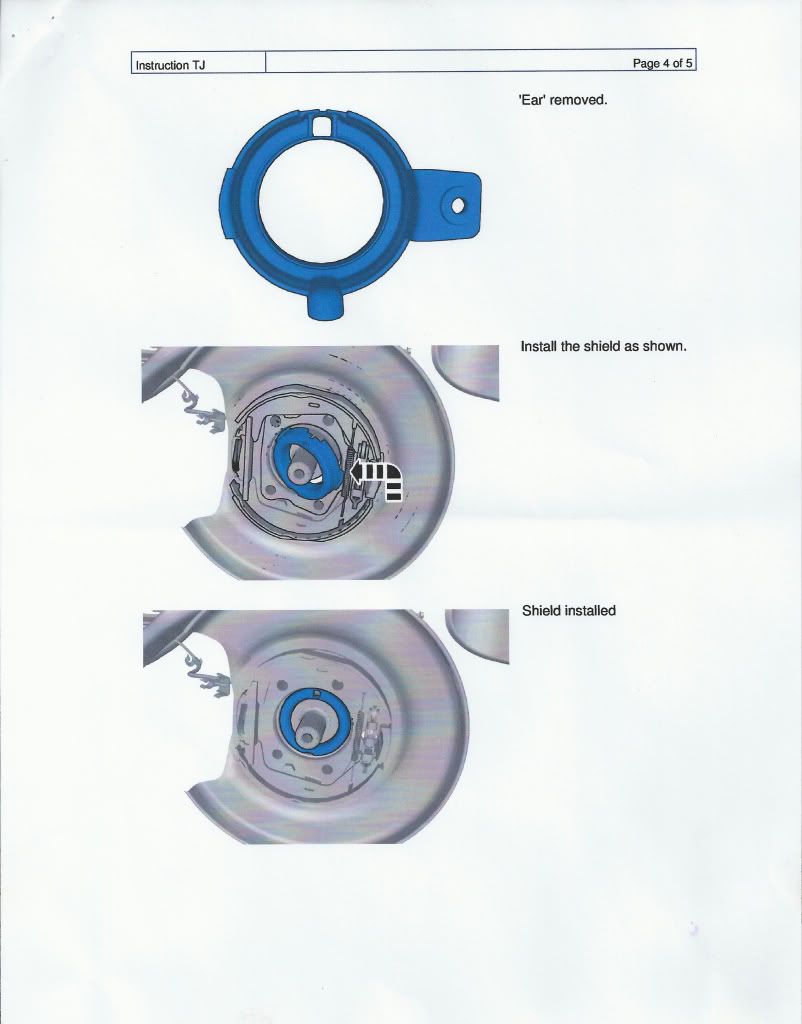
![Image]()
PG05
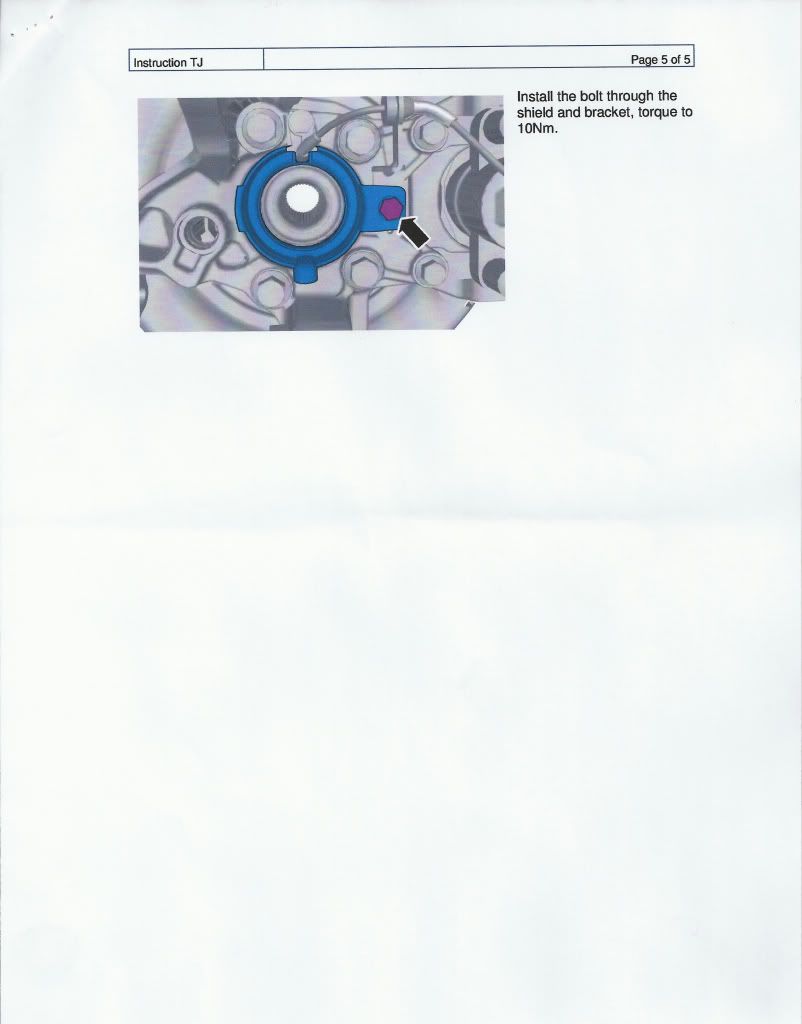
![Image]()
And now the pic-by-pic instructions.
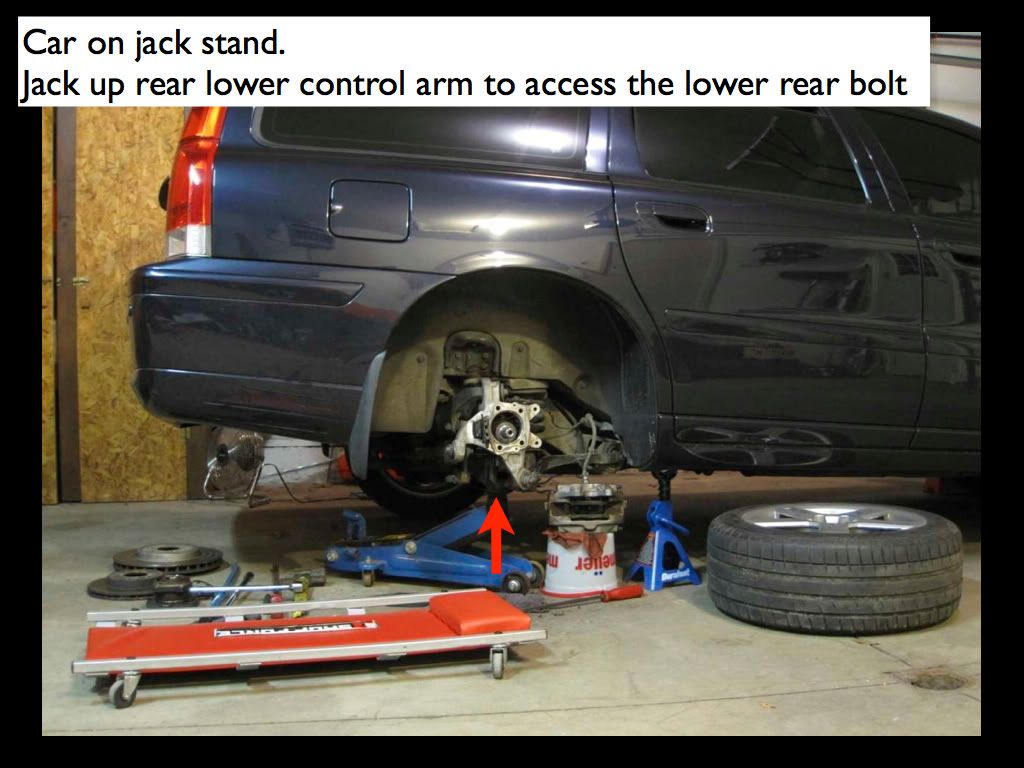
Remove axle bolt. Jack up car. I supported mine on jack stand because I would later use the hydraulic jack to lift the rear lower control arm.
001
![Image]()
Remove caliper (2 bolts) and rotor (1 screw on rotor hat).
Remove axle bolt. I forgot to remove mine before jacking up car, so I put the lug wrench under the lug bolt (to prevent hub from spinning) and tapped on the socket wrench handle with a rubber mallet to simulate an impact wrench. If I had an impact wrench, I would have used that.
002
![Image]()
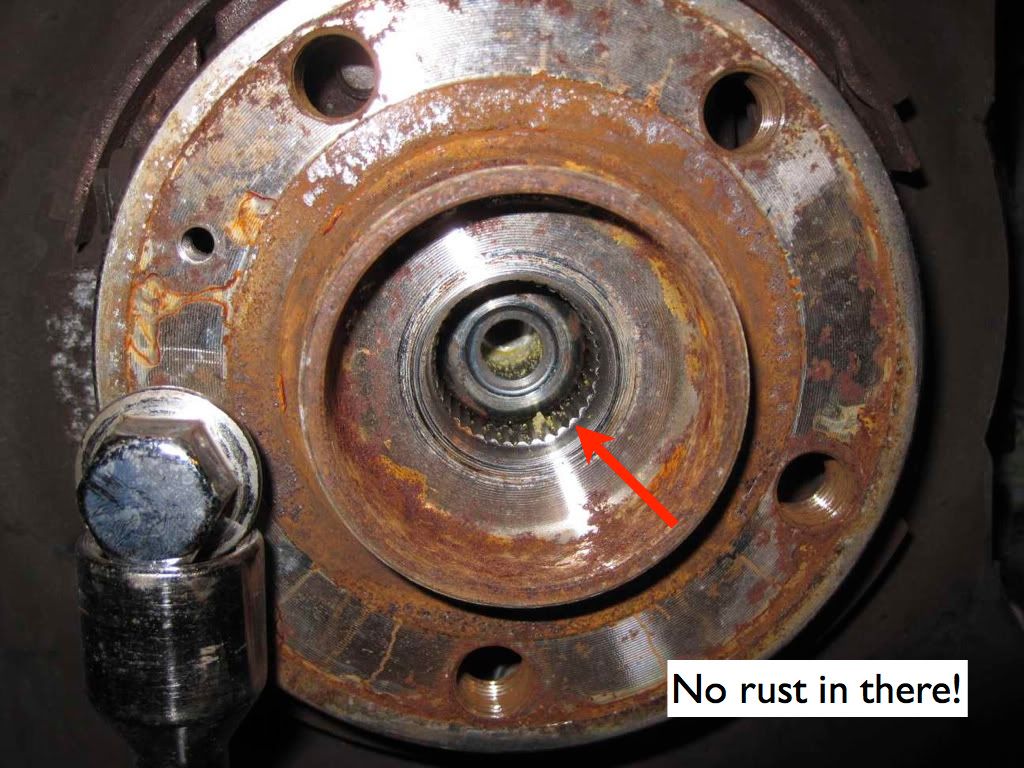
View of my axle with axle bolt removed. Thankfully no rust on the splines. That meant my hub was not seized to the axle. Phew!
003
![Image]()
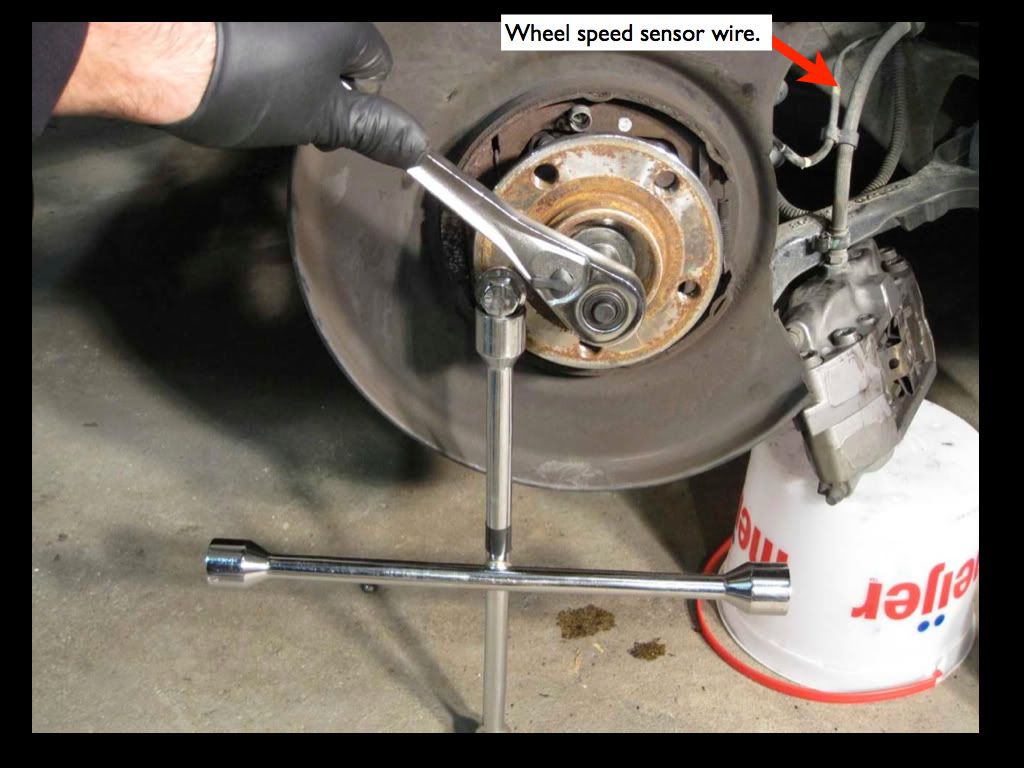
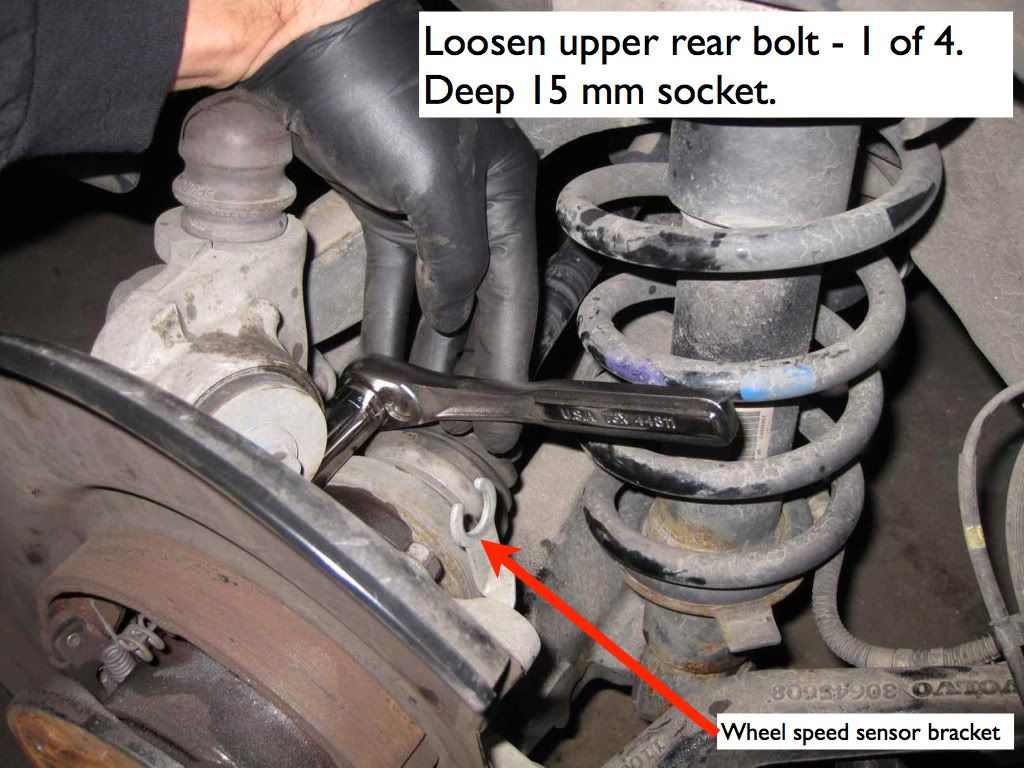
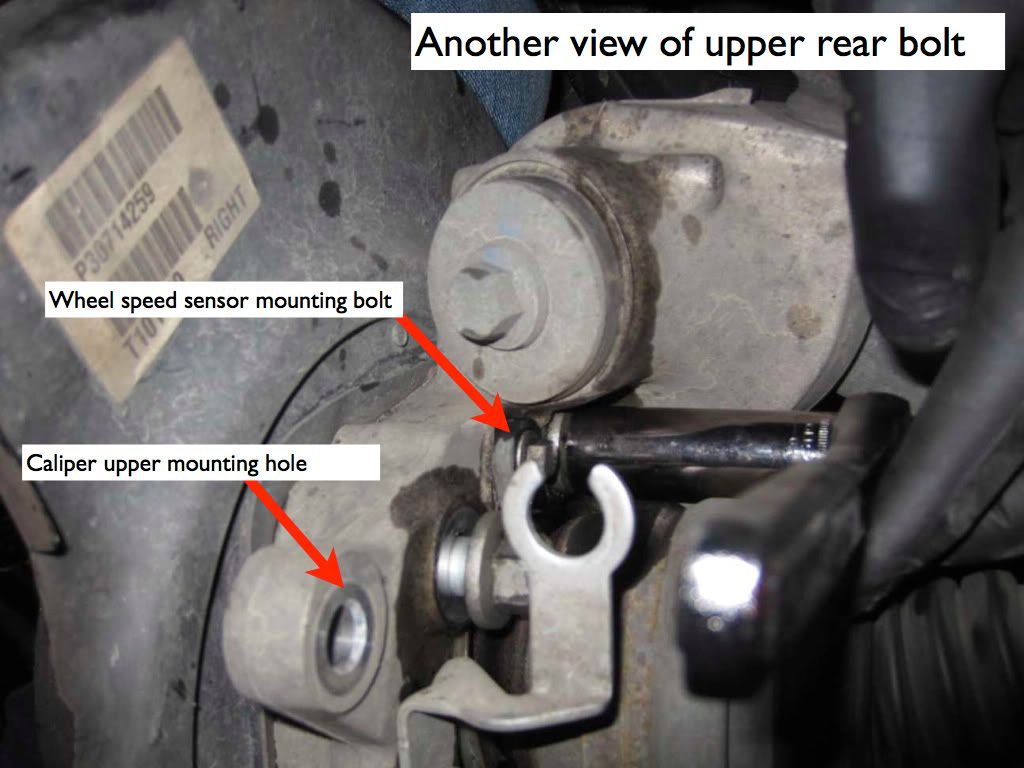
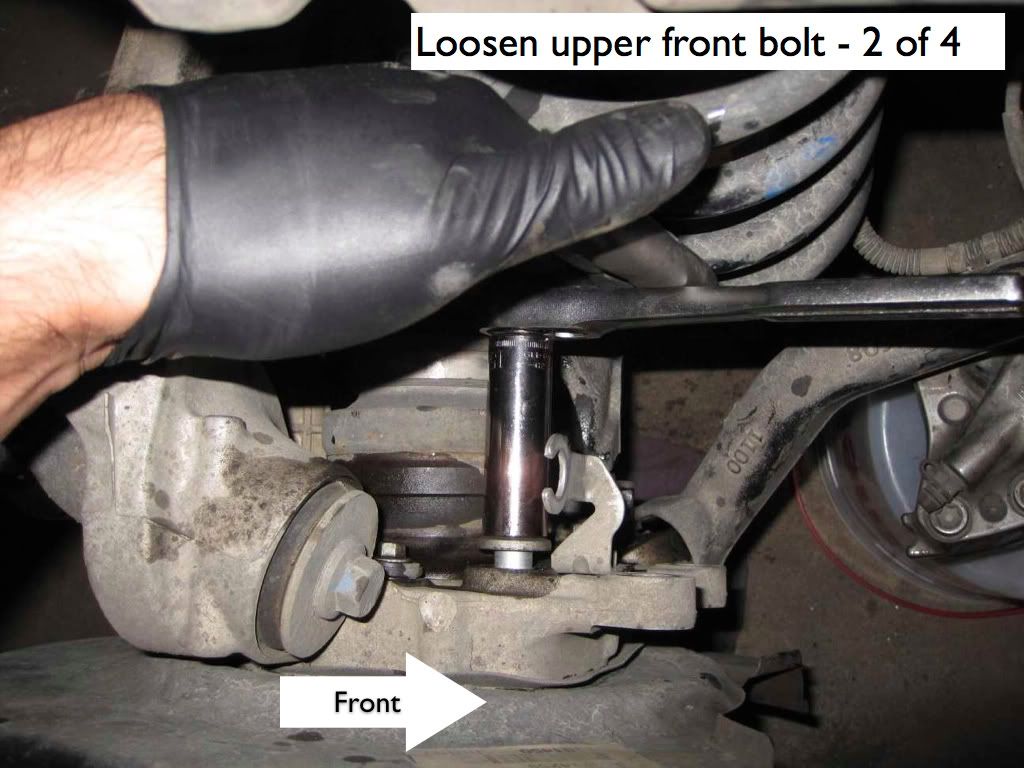
Loosen the four hub bolts from the inboard side. The dark fluid is the PB Blaster I applied to the bolts the night before. I struck the end of the wrench handle with a rubber mallet to break the bolts free so I didn't smash my knuckles. No particular order. I just numbered them for the sake of numbering them. It is not necessary to remove the parking brake shoes or rotor's steel splash shield. My wheel speed sensor was broken away from its mounting bolt, so I removed the sensor to get it out of the way.
004
![Image]()
005
![Image]()
006
![Image]()
007
![Image]()
The fourth bolt (lower, rear position) is partially blocked by the rear lower control arm. Many threads suggested various ways around it (box end wrench, 6" extension, etc.). I jacked up the rear lower control arm until the car was just about to lift up off the jack stand, e.g. the rear suspension was at is rest state as if setting on the ground with the wheel on.
008
![Image]()
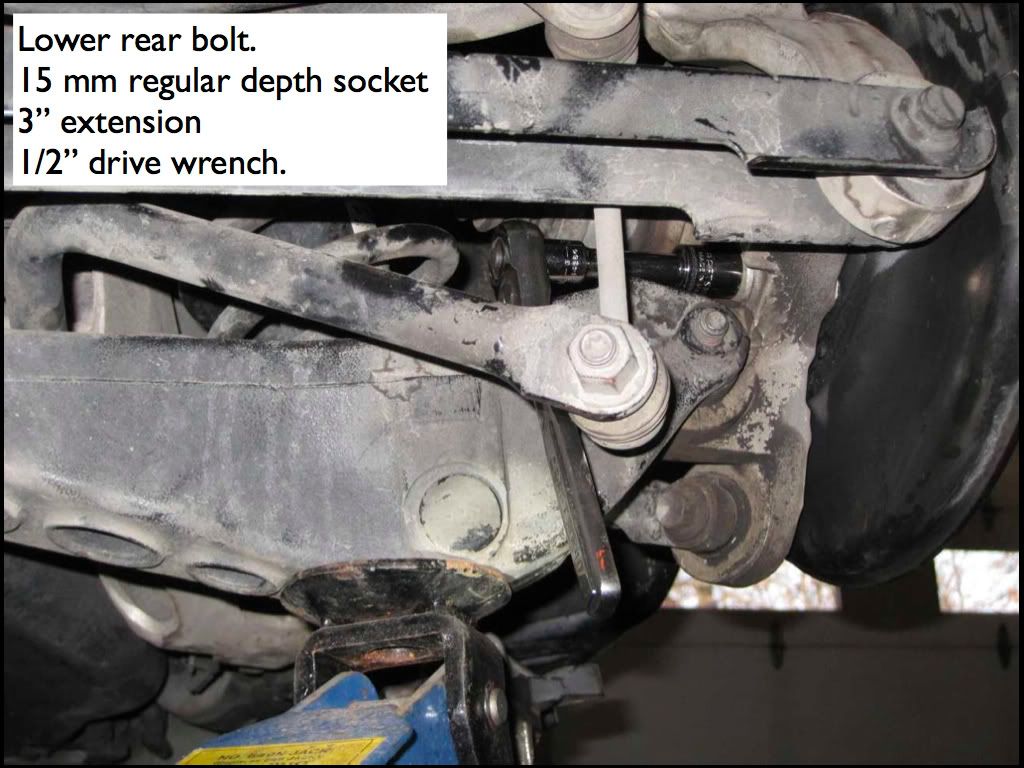
I could reach the bolt head with the wrench and loosen it by hand without a breaker bar. I was only able to loosen it one click at a time with the ratchet. Once loosened several clicks, I could back out the bolt the remaining threads by hand. An no bloody knuckles!
009
![Image]()
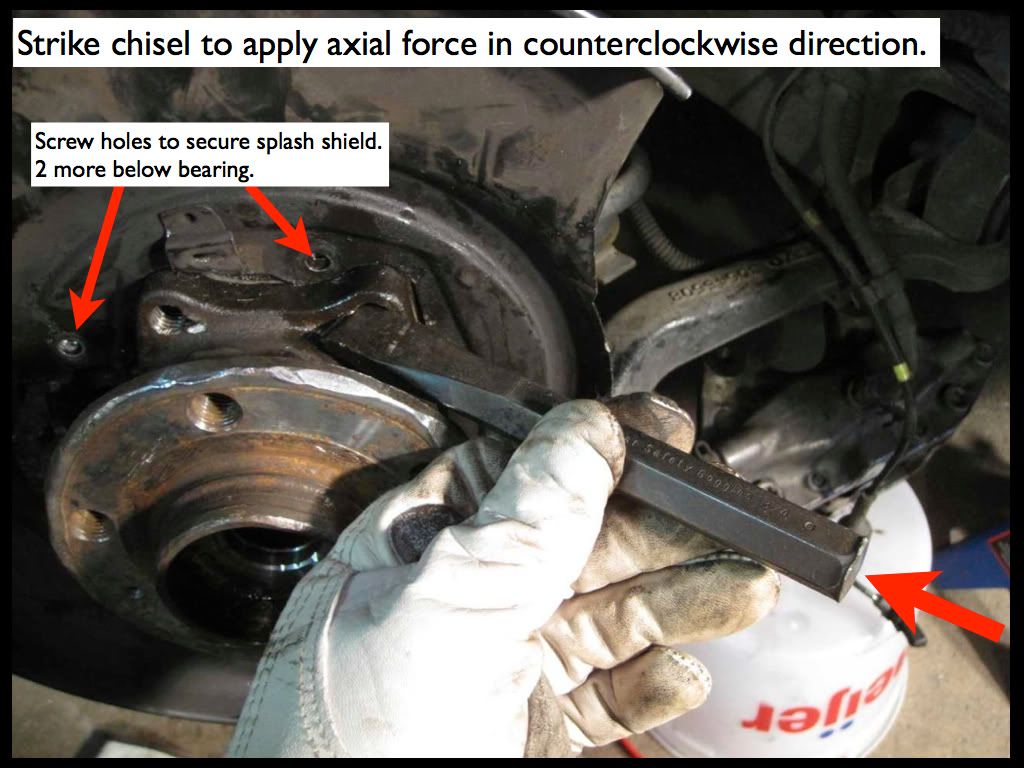
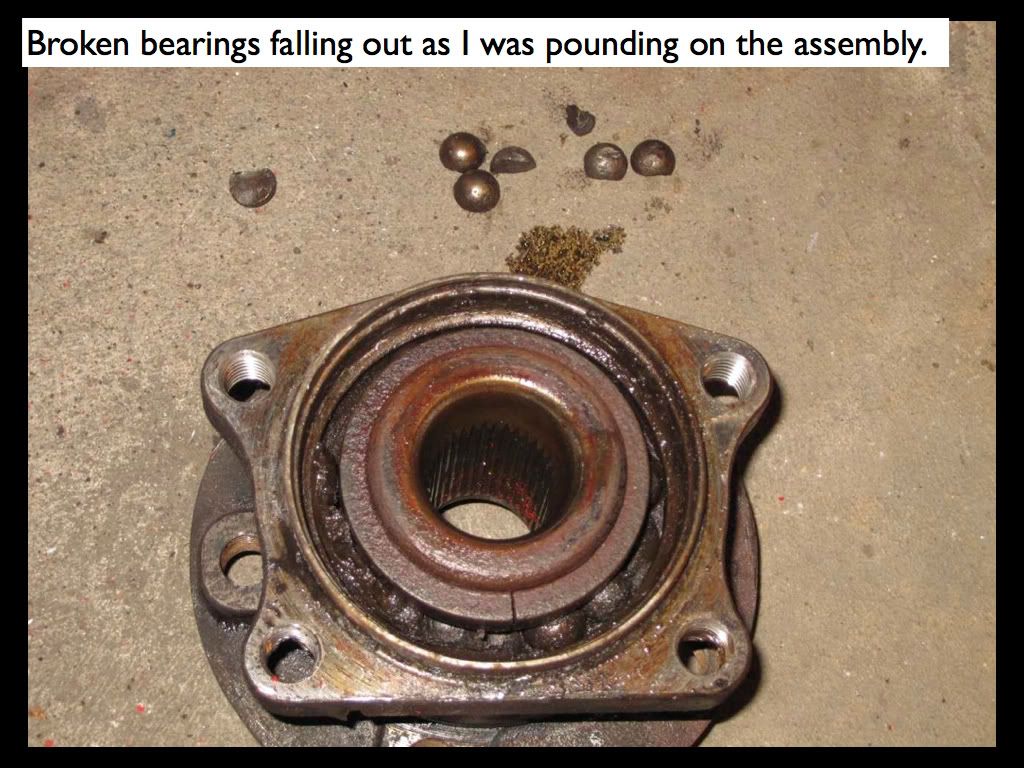
Now the fun part, removing the old bearing (hub). I tried various forms of persuasion, including hammers up to and including a 3 lb. sledgehammer. As I was beating on the bearing, some of the old, broken bearing were falling out and the splash shields worked themselves free. What finally worked was to use a cold chisel as shown, here with blows in the clockwise direction.
010
![Image]()
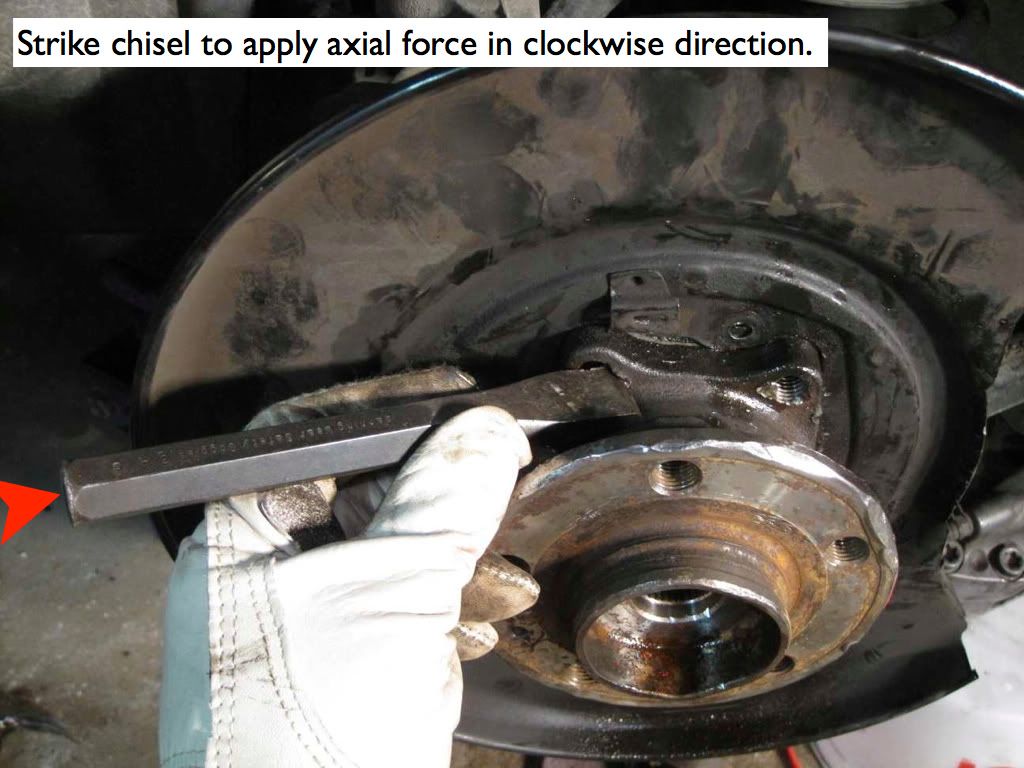
And counterclockwise direction. I wasn't worried about destroying the threads in the bearing, or the ID of the holes in the knuckle because the chisel didn't come close to the knuckle.
011
![Image]()
After working the bearing in both directions, I inserted a pry bar between the bearing and knuckle like this. I used a hammer to wedge the pry bar in slightly, working my way around the bearing so as to not get the bearing cockeyed too much within the knuckle. I did manage to knick the paint slightly on the brake splash shield, so I touched it up with spray paint. Once the bearing separated from the knuckle about 1.5 mm outboard, I was able to wiggle it the rest of the way out by hand.
012
![Image]()
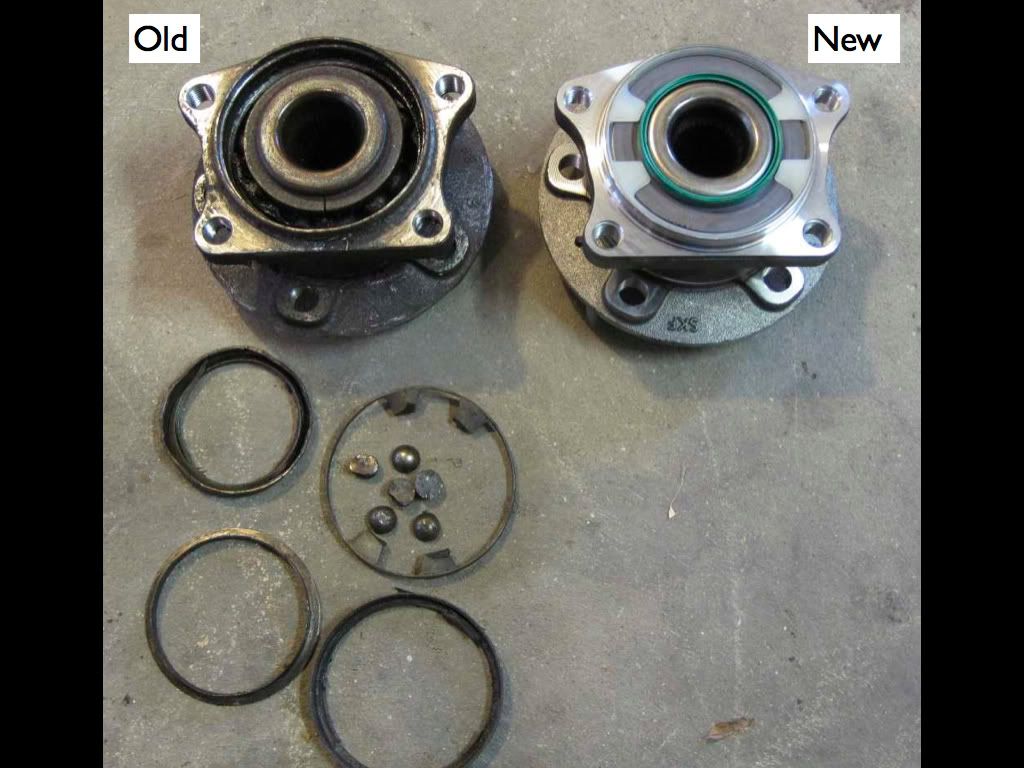
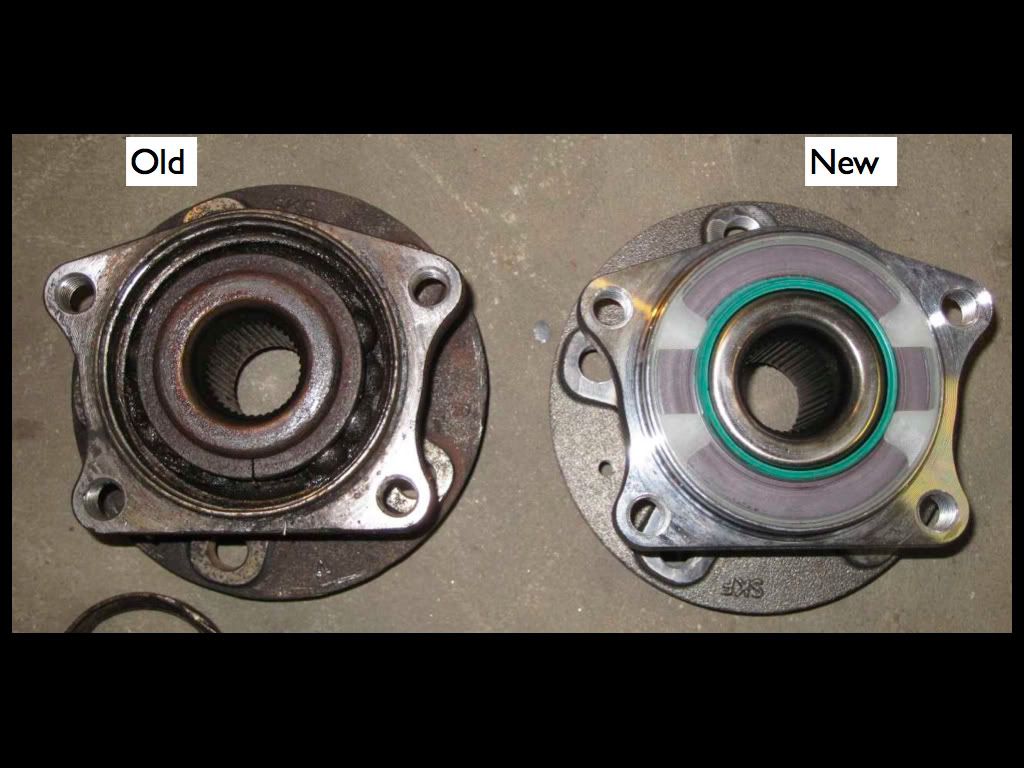
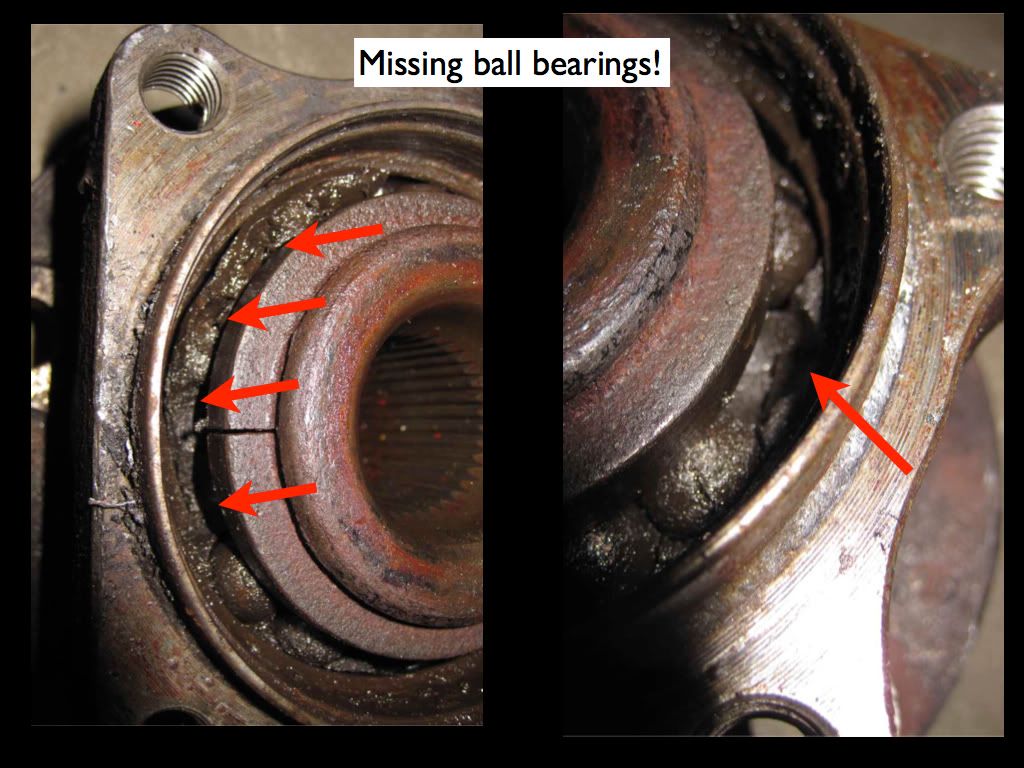
Here are several photos of the carnage. Ugh.
The rings should not look like that!
013
![Image]()
014
![Image]()
015
![Image]()
016
![Image]()
017
![Image]()
018
![Image]()
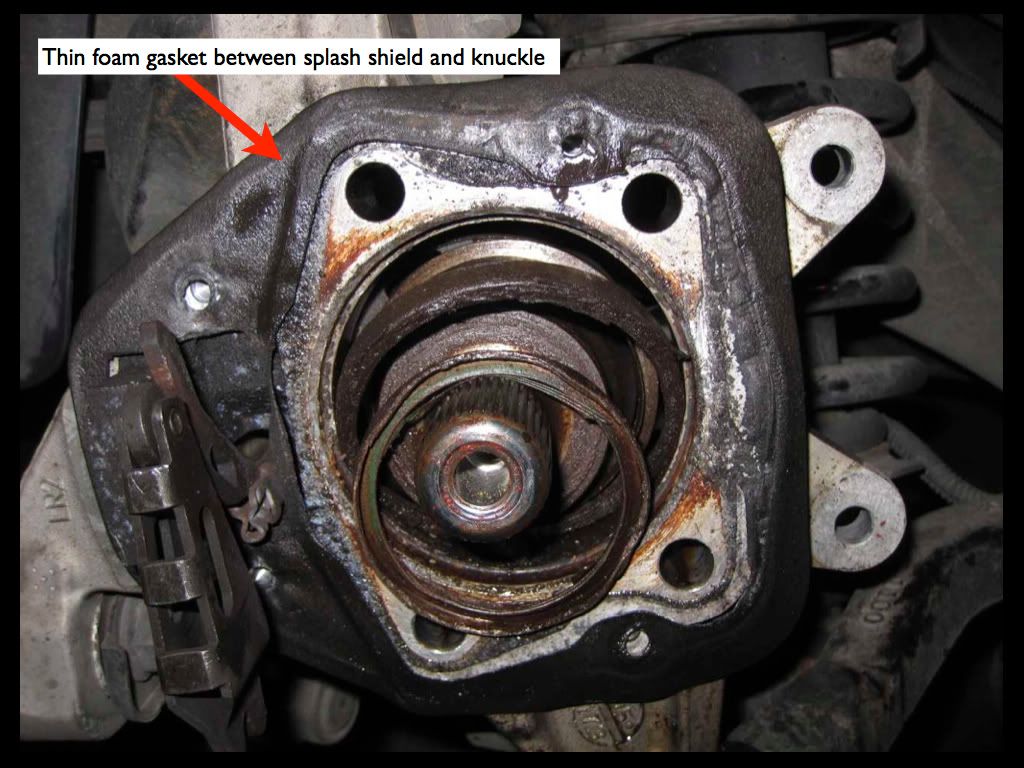
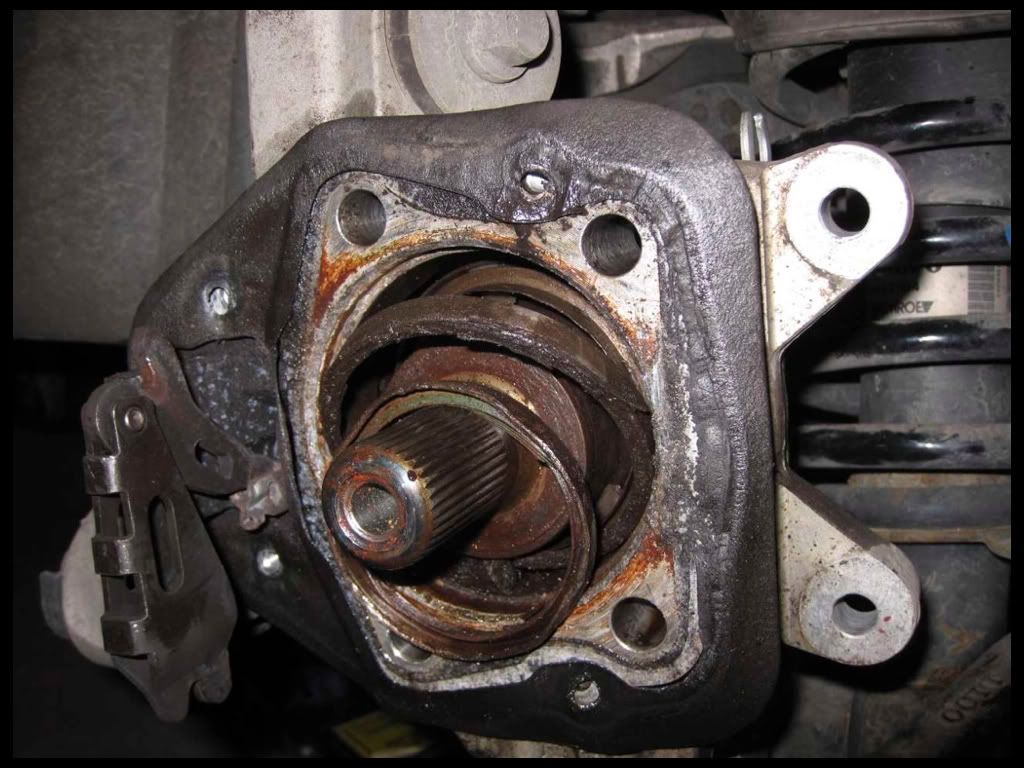
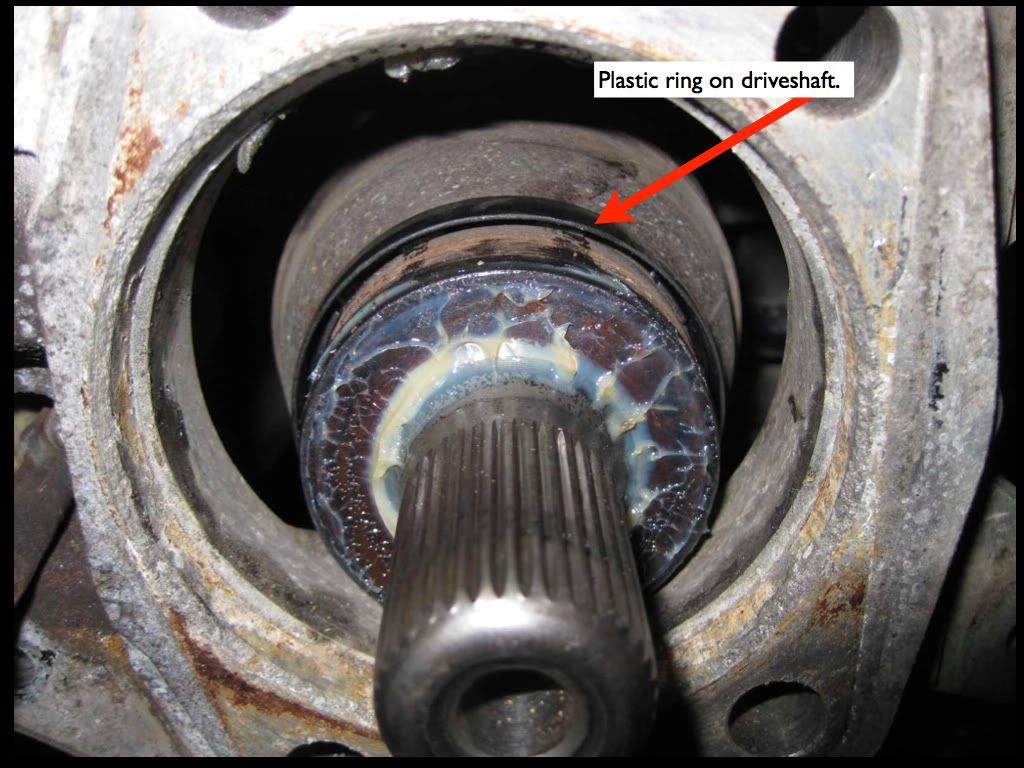
Here are the steps to putting it back together with the new plastic splash shields described in the Technical Journal.
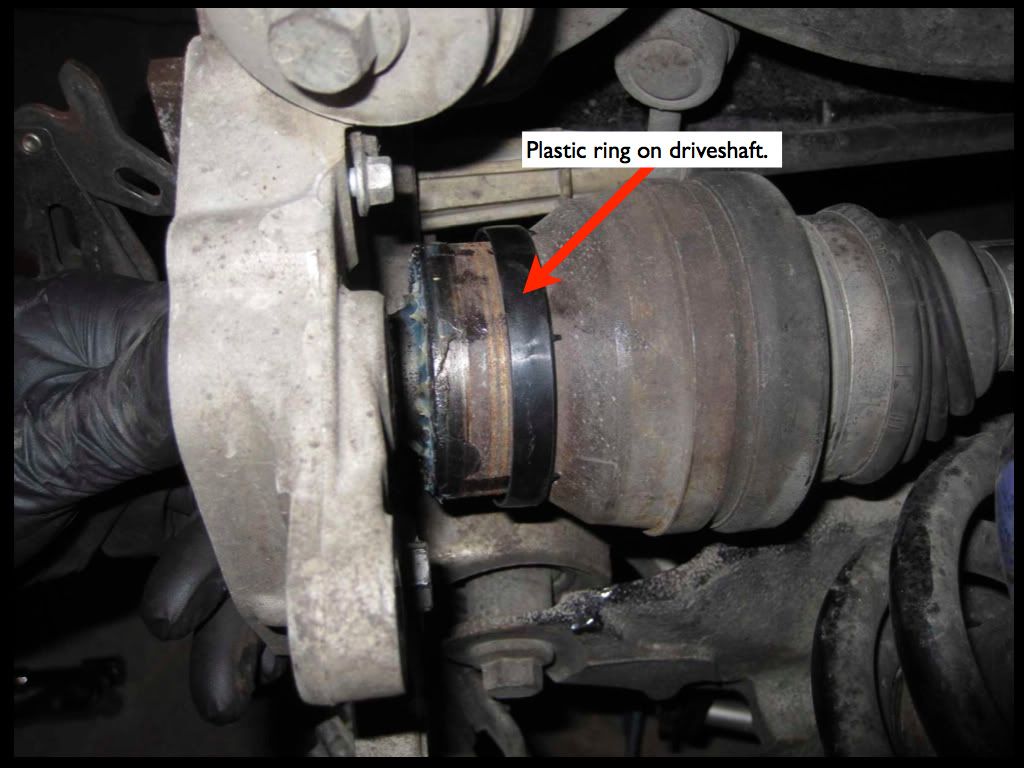
Two views of small plastic ring that fits on driveshaft. Pay attention to the orientation of the pointy protrusions per page 3 of the Technical Journal.
024
![Image]()
025
![Image]()
After starting this thread: Linky: Please-help-diagnose-grinding-noise-from-rear-axle-area-(video), the consensus was bad wheel bearing. I also had two faults displayed on the message center:
23629
23630
After reading many, many threads, I pieced together the knowledge shared by many. Here are some of those threads:
1. linky: For-all-you-hub-rear-wheel-bearing-lovers
2. linky: How-to-Install-a-rear-wheel-bearing
Here goes.
Tools:
- Metric socket set. Standard and deep depth. 3" extension.
- Small persuader (sledge hammer), e.g. 3 lb.
- Rubber mallet or dead-blow hammer.
- Cold chisel.
- Jack stand(s).
- Hydraulic jack.
- PB Blaster.
- Patience.
- Heated garage (optional, but rather helpful in the cold weather).
- Loud music.
- Heavy duty nitrile gloves (mine are 6 mil) - keeps the hands cleaner.
Parts:
- Rear wheel bearing (hub) 31340690 - I obtained my OE from the dealer parts department.
- Splash shield kit - included with bearing.
- Technical Journal TJ25167 (Sept 2011) P2 Rear Hub Bearing Splash Shield Instructions
- Brake shoe kit - 31262869 because my shoes started to delaminate.
- Wheel speed sensor - 30773743 because my sensor was broken from excess movement in bearing.
- Parking brake springs - because I was replacing the shoes.
- return spring 3546028-6
- retaining spring 30645831
- return spring 9173601-7
Here is the Technical Journal (5 pages).- retaining spring 30645831
- return spring 9173601-7
PG01
PG02
Notice the orientation of the "teeth" on the inner diameter of the shield, and the pointy protrusions on the inboard edge of the shield.
PG03
PG04
PG05
And now the pic-by-pic instructions.
Remove axle bolt. Jack up car. I supported mine on jack stand because I would later use the hydraulic jack to lift the rear lower control arm.
001

Remove caliper (2 bolts) and rotor (1 screw on rotor hat).
Remove axle bolt. I forgot to remove mine before jacking up car, so I put the lug wrench under the lug bolt (to prevent hub from spinning) and tapped on the socket wrench handle with a rubber mallet to simulate an impact wrench. If I had an impact wrench, I would have used that.
002
View of my axle with axle bolt removed. Thankfully no rust on the splines. That meant my hub was not seized to the axle. Phew!
003
Loosen the four hub bolts from the inboard side. The dark fluid is the PB Blaster I applied to the bolts the night before. I struck the end of the wrench handle with a rubber mallet to break the bolts free so I didn't smash my knuckles. No particular order. I just numbered them for the sake of numbering them. It is not necessary to remove the parking brake shoes or rotor's steel splash shield. My wheel speed sensor was broken away from its mounting bolt, so I removed the sensor to get it out of the way.
004
005
006
007
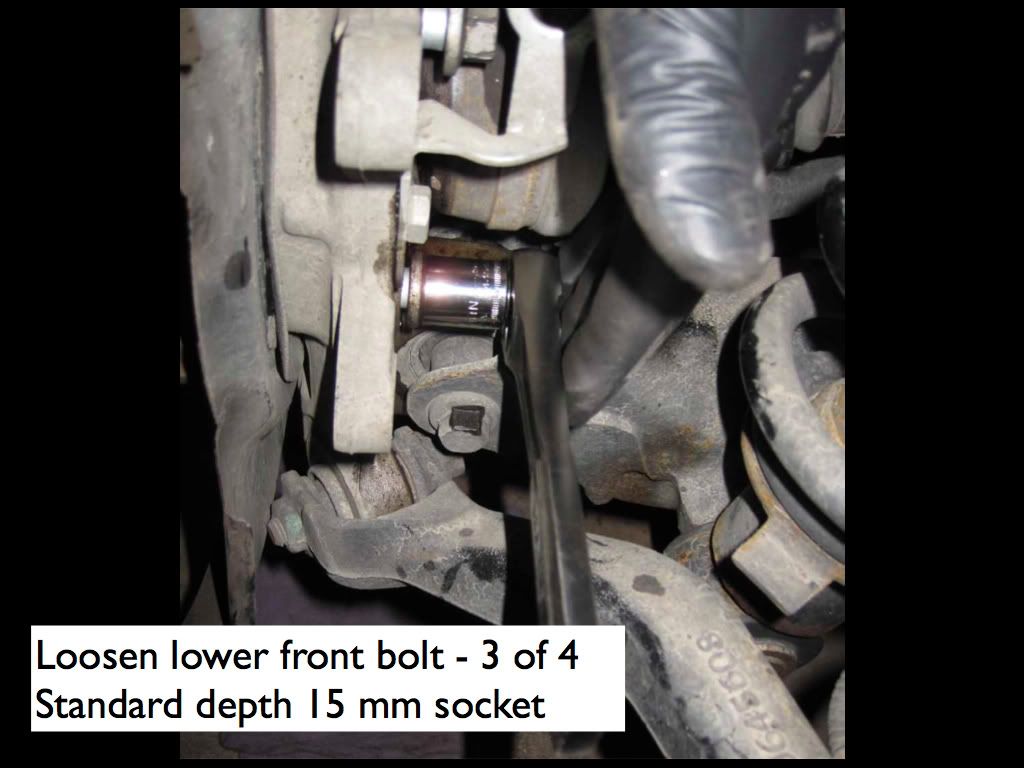
The fourth bolt (lower, rear position) is partially blocked by the rear lower control arm. Many threads suggested various ways around it (box end wrench, 6" extension, etc.). I jacked up the rear lower control arm until the car was just about to lift up off the jack stand, e.g. the rear suspension was at is rest state as if setting on the ground with the wheel on.
008
I could reach the bolt head with the wrench and loosen it by hand without a breaker bar. I was only able to loosen it one click at a time with the ratchet. Once loosened several clicks, I could back out the bolt the remaining threads by hand. An no bloody knuckles!
009
Now the fun part, removing the old bearing (hub). I tried various forms of persuasion, including hammers up to and including a 3 lb. sledgehammer. As I was beating on the bearing, some of the old, broken bearing were falling out and the splash shields worked themselves free. What finally worked was to use a cold chisel as shown, here with blows in the clockwise direction.
010
And counterclockwise direction. I wasn't worried about destroying the threads in the bearing, or the ID of the holes in the knuckle because the chisel didn't come close to the knuckle.
011
After working the bearing in both directions, I inserted a pry bar between the bearing and knuckle like this. I used a hammer to wedge the pry bar in slightly, working my way around the bearing so as to not get the bearing cockeyed too much within the knuckle. I did manage to knick the paint slightly on the brake splash shield, so I touched it up with spray paint. Once the bearing separated from the knuckle about 1.5 mm outboard, I was able to wiggle it the rest of the way out by hand.
012

Here are several photos of the carnage. Ugh.
The rings should not look like that!
013
014
015
016
017
018
Here are the steps to putting it back together with the new plastic splash shields described in the Technical Journal.
Two views of small plastic ring that fits on driveshaft. Pay attention to the orientation of the pointy protrusions per page 3 of the Technical Journal.
024
025